
Are you planning to visit the Faroe Islands and don’t know where to start planning for your Faroe Islands itinerary? I get it – there are 18 islands, countless beautiful locations and so many tunnels it’s hard to plan a good itinerary on your own. This is why I did all the research for you and comprised it all in the ultimate itinerary for the Faroe Islands!
Faroe Islands itinerary
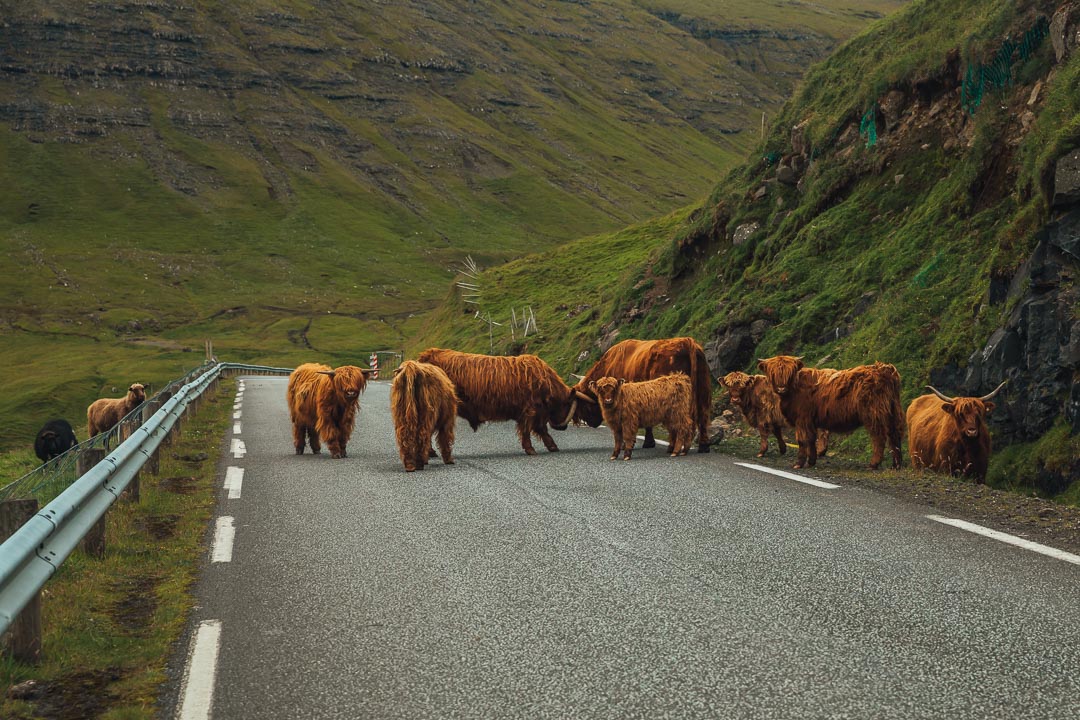
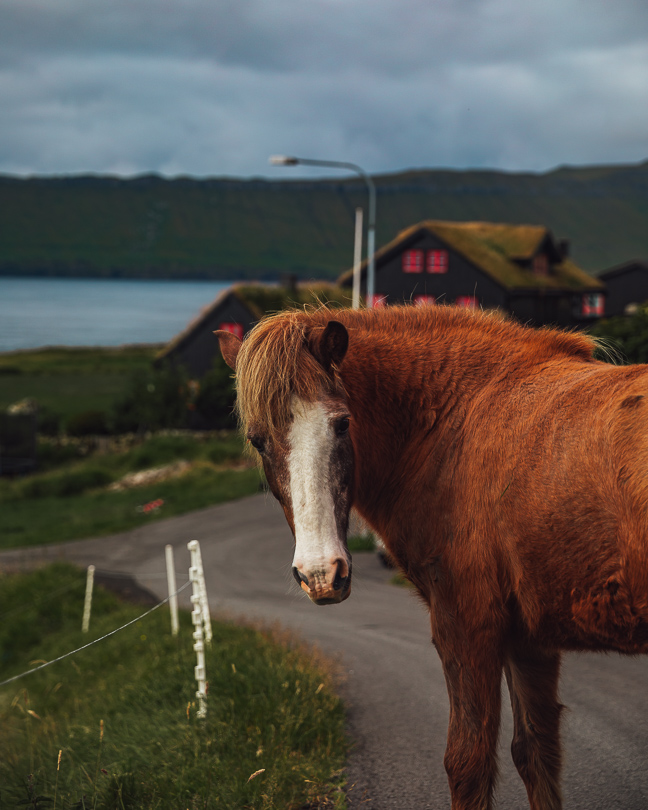
The Faroe Islands is the perfect destination for nature lovers, hiking enthusiasts, photographers and those on a hunt for unique and unexplored destinations. The Faroe Islands are an autonomous territory of the Kingdom of Denmark and home to just over 53,000 inhabitants, but you’ll definitely meet more sheep than people when you visit the Faroe Islands, which makes sense since the country itself has actually been named after sheep (old Norse Færeyjar, which literally means Sheep Islands) and could very well be called The Sheep Islands.

Day 1 – Vagár Island: Arrival and visit Gásadalur
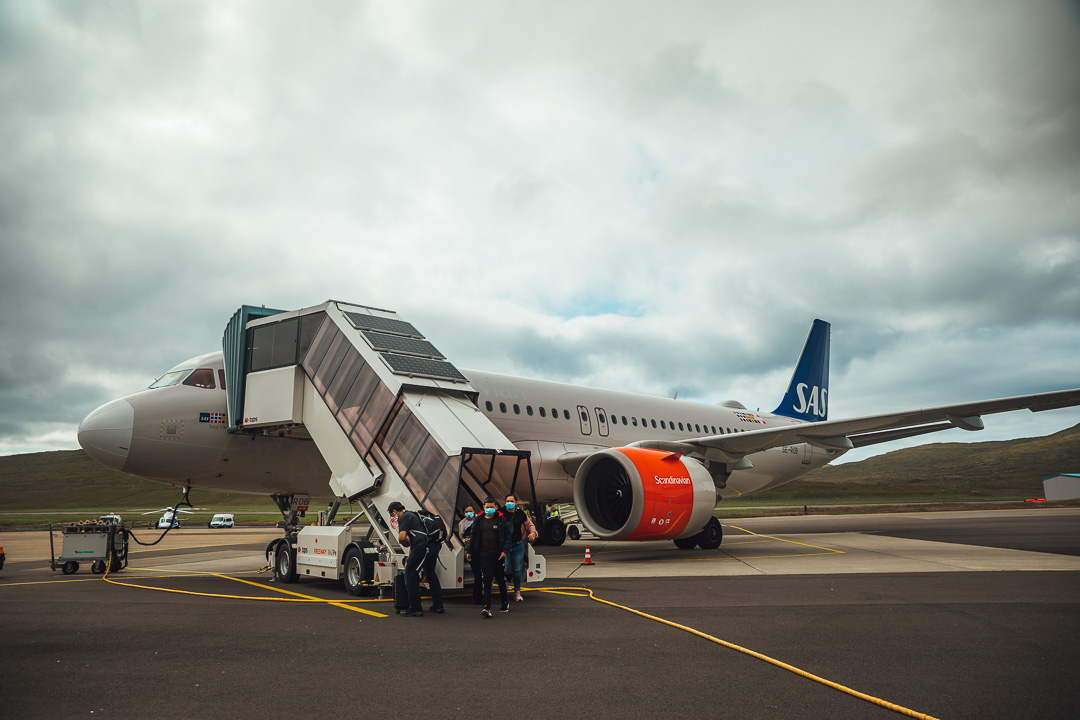
Get a SIM card
After you arrive at the airport, head to the information desk to buy a SIM card. We always buy a local SIM when we travel because we love having access to the map and all saved points of interest. It just makes travel easier if you don’t have to rely on WiFi while you visit Faroe Islands and do your Faroe Islands travel itinerary.
We bought 12GB and it cost us around 230 DKK ($34). You could just opt for a basic one for 100 DKK ($15) though. We usually pop the SIM in Mike’s phone (he has a double slot) and then he shares the hotspot with me. This way we don’t have to buy two SIM cards and can have more data for less.
Car rental in the Faroe Islands
Car rental prices are crazy in the Faroe Islands, there’s no secret about that. We had no idea what awaits us when we booked the (rather cheap) plane tickets, so we were definitely in for a surprise!
Since we also decided to visit the Faroe Islands two weeks before arriving, this also meant a lot of cheaper rental cars were already booked up, which left us with the most expensive choices.
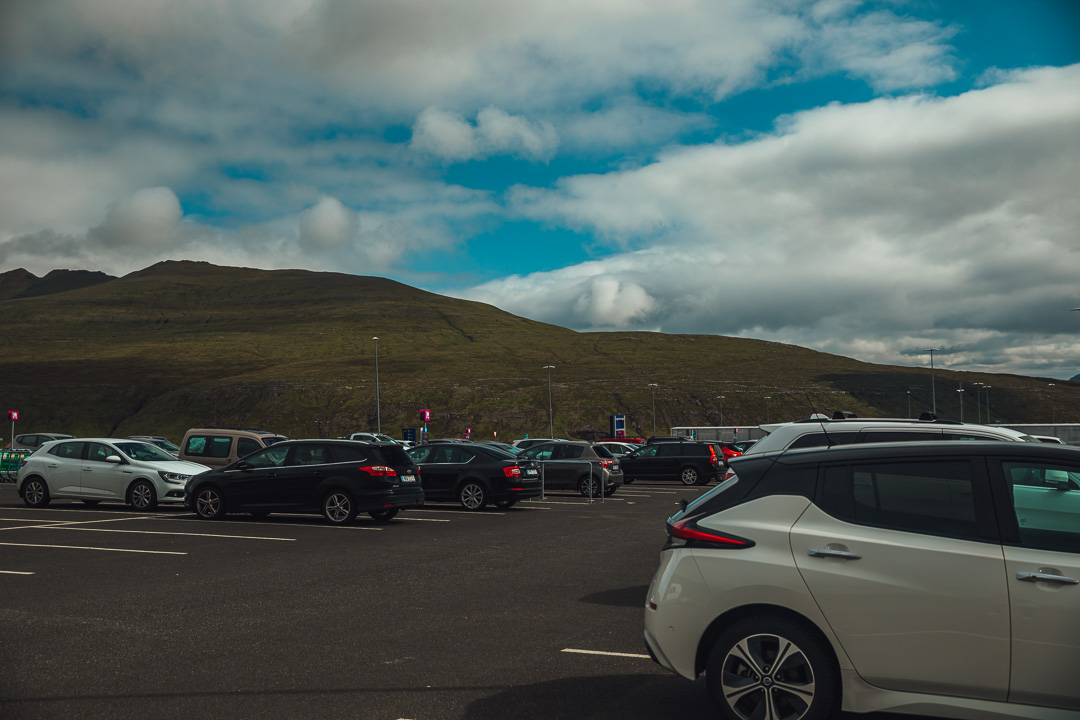

So my best tip is to create your Faroe Islands itinerary and book a car rental early! As soon as you book your flights, get the car. You will need it every day and I do not recommend you travel around the Faroe Islands without a car. We scoured the internet for a rental place that’s not on Google maps yet since all the bigger websites had prices as high as 1400 DKK ($2000) for 10 days. We finally found a small rental and got an older car for 5000 DKK ($730) for 10 days. The rental price was probably higher than what the car is worth, but we wanted to save money instead of getting a luxury car.
If you’re out early with the booking, you can also check out this car rental page and find a rental for as little as 645 DKK a day.
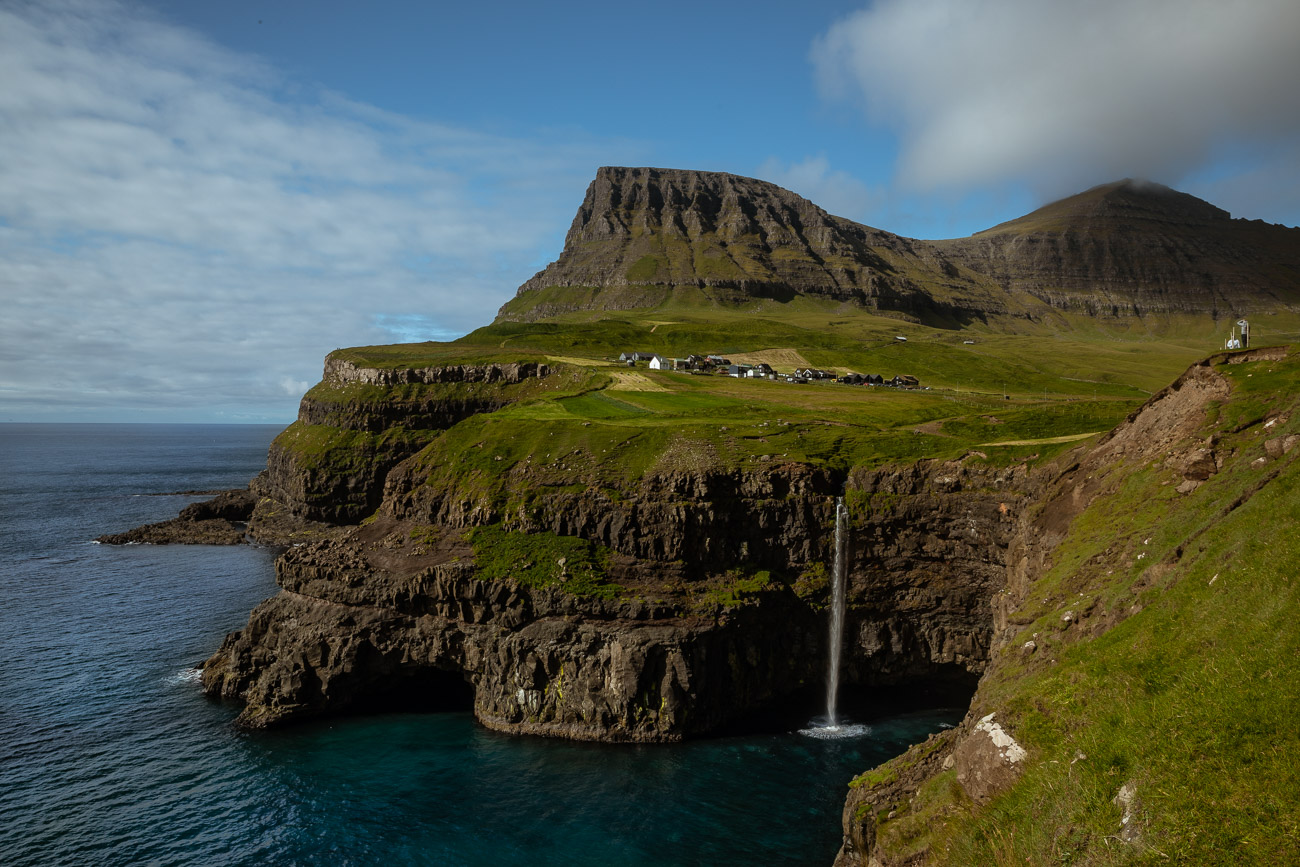
Drive to Gásadalur – Your base in Vágar
The drive from the Vágar Airport to Gasadalur is only 20 minutes, but do make sure you get something to eat before you head there. There’s a supermarket in Sørvágur, but if you happen to arrive on a Sunday when everything is closed, then head to the gas station and get something to eat there.
We got groceries for breakfast, simple lunch to take hiking and something to cook on the evenings when we are in the Airbnb. There are not a lot of restaurants in Vágar, especially if you’re not so keen on seafood.
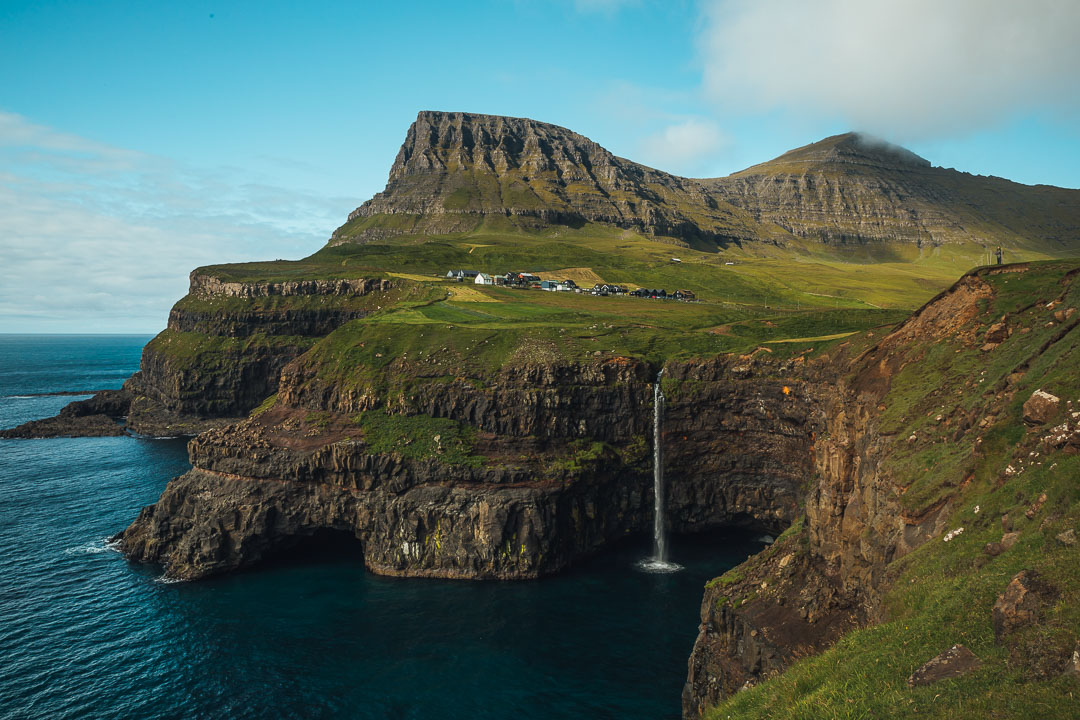
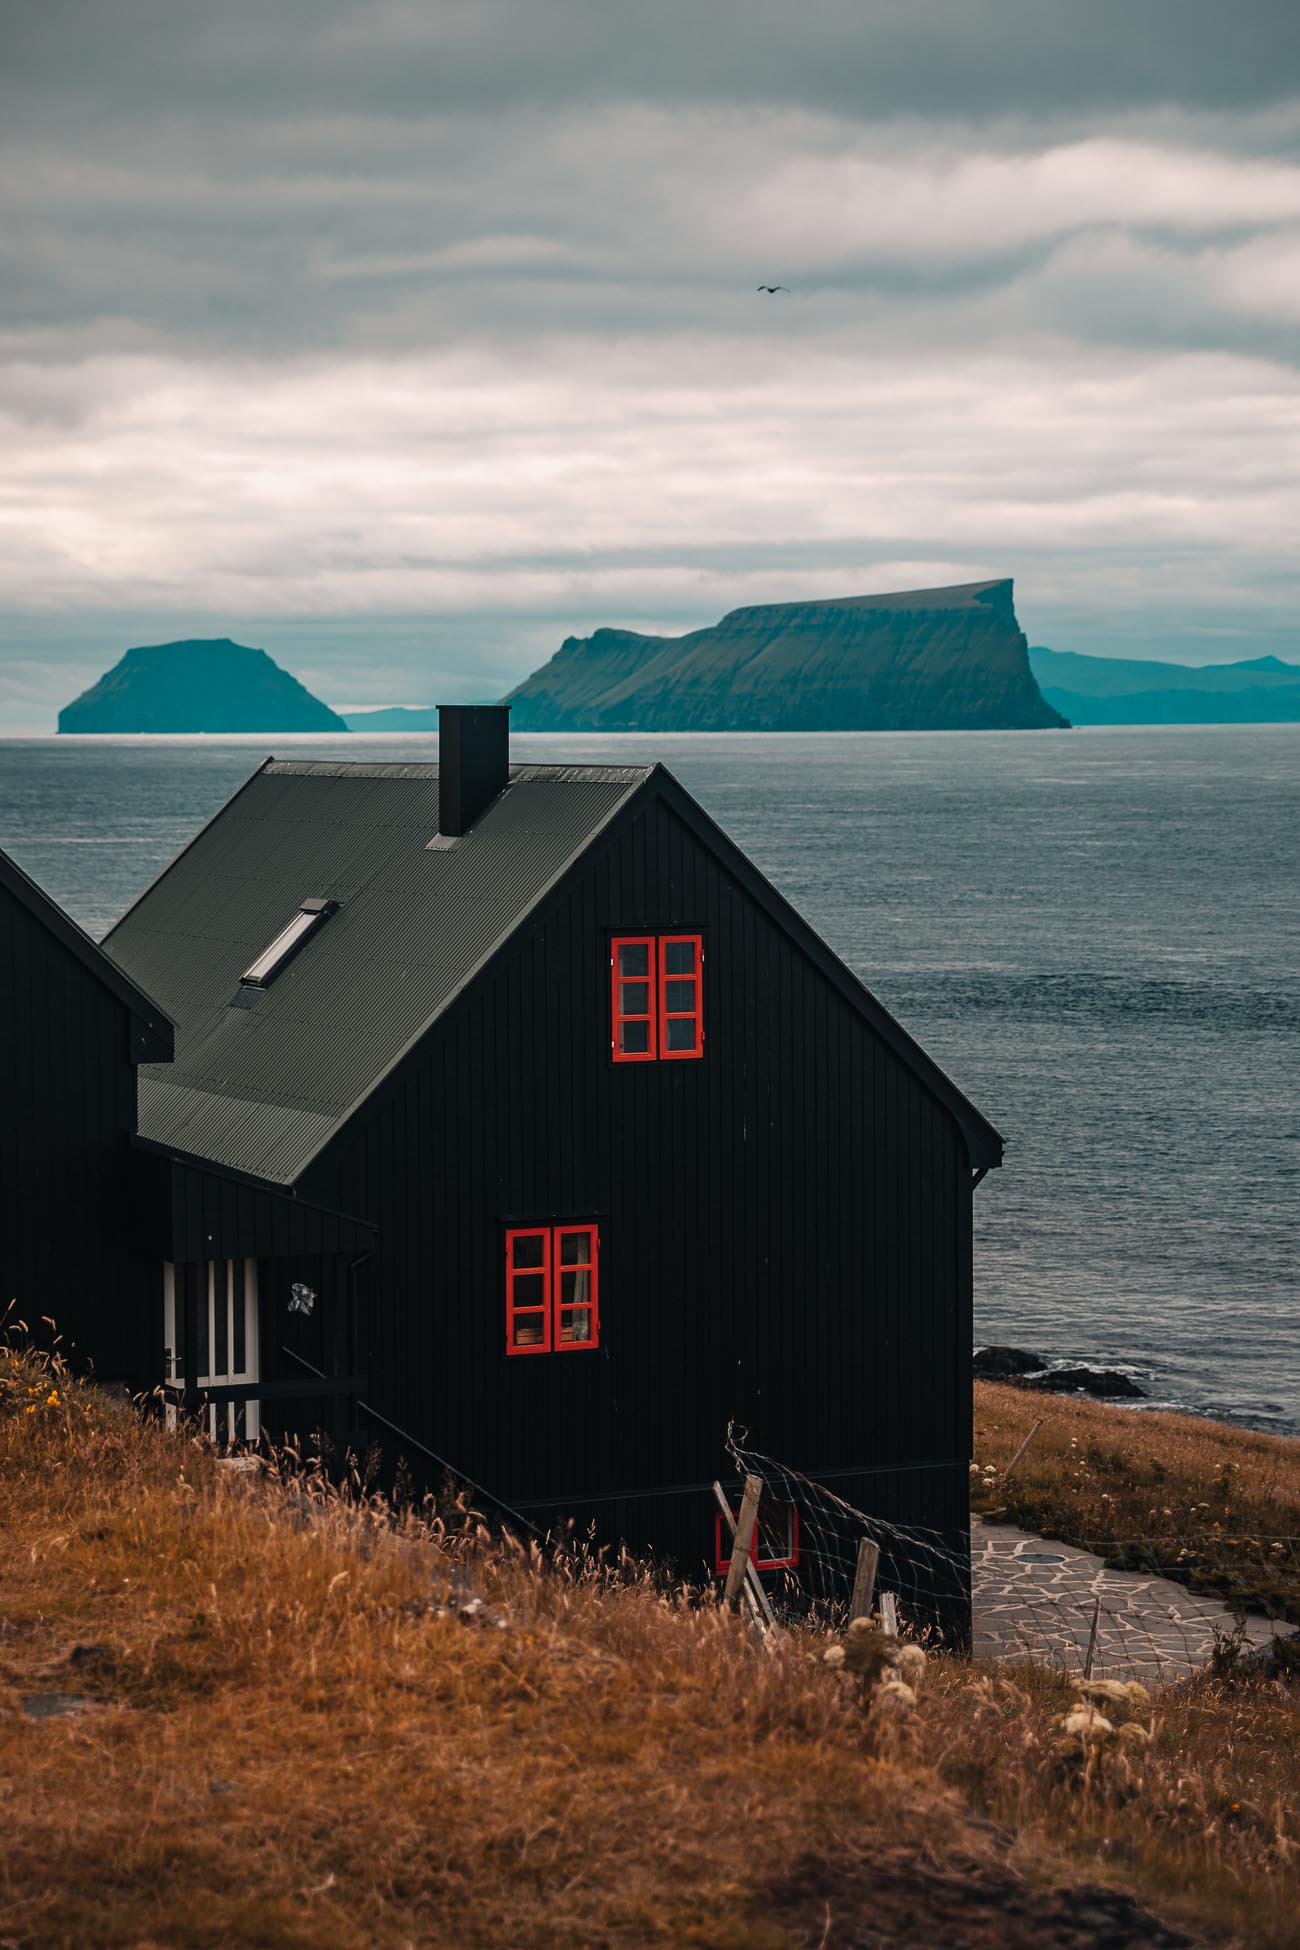
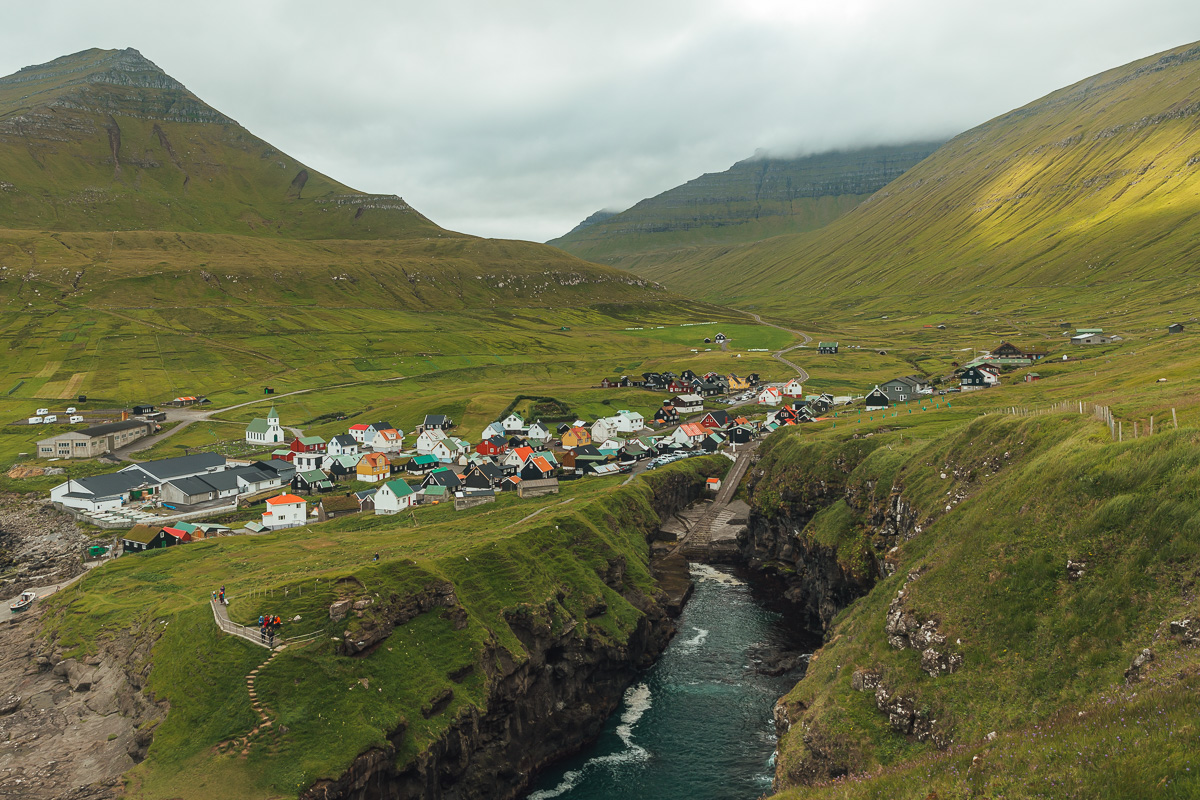
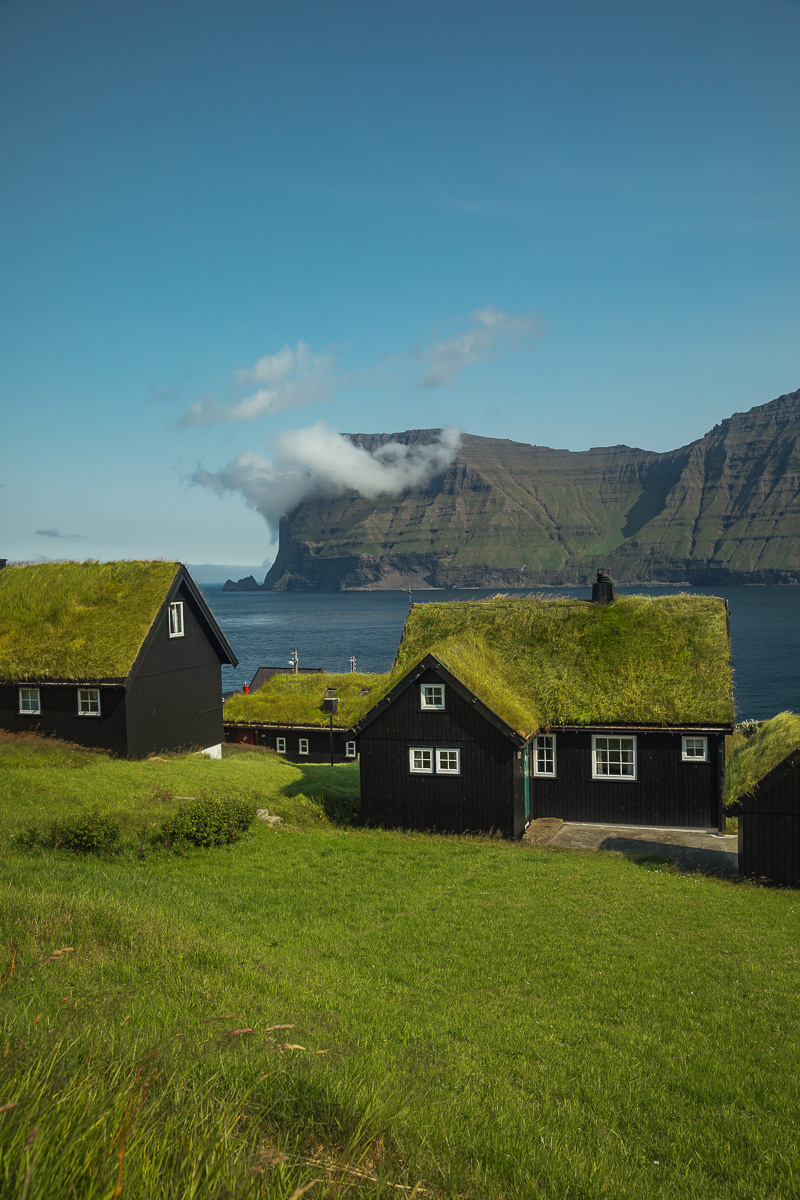
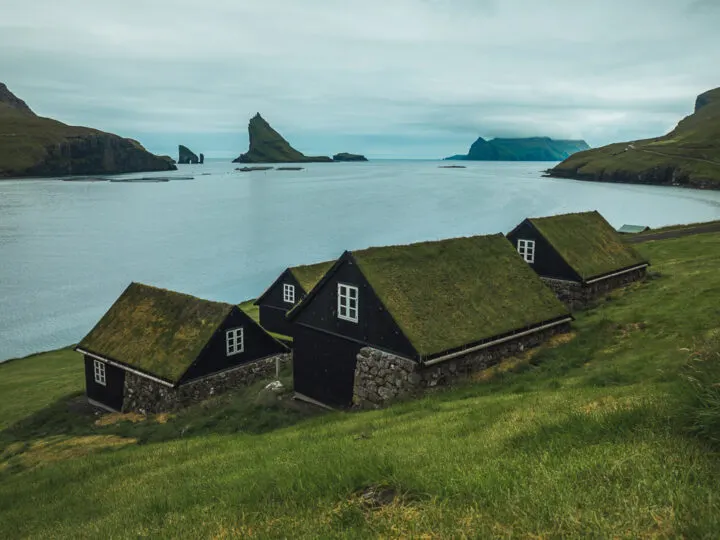
In Gásadalur we stayed in one of the very few Airbnb’s in this village and this was our base for two nights while exploring the island Vágar.
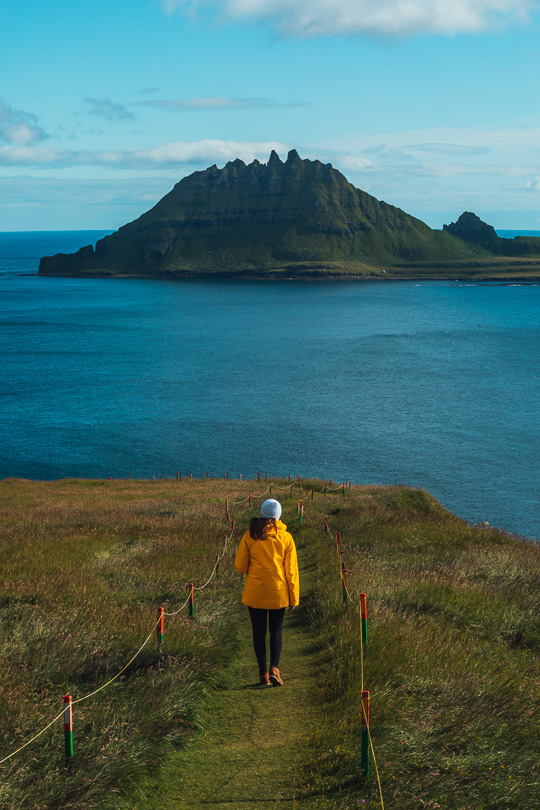

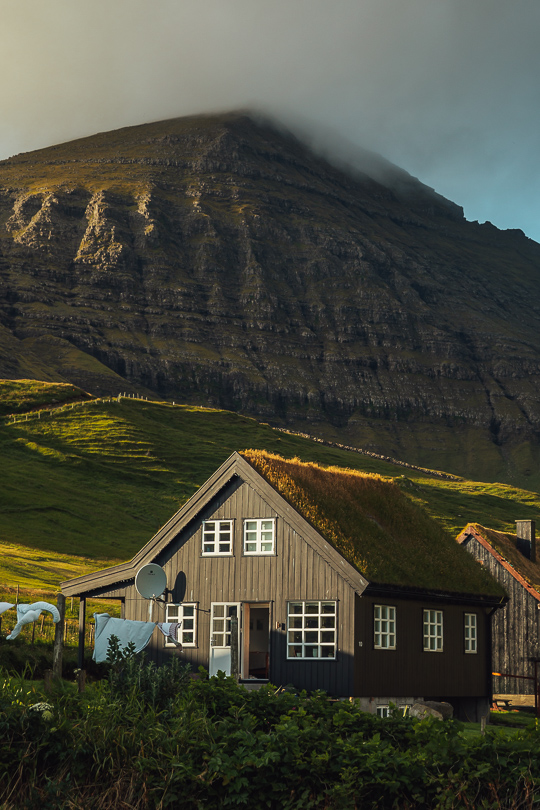


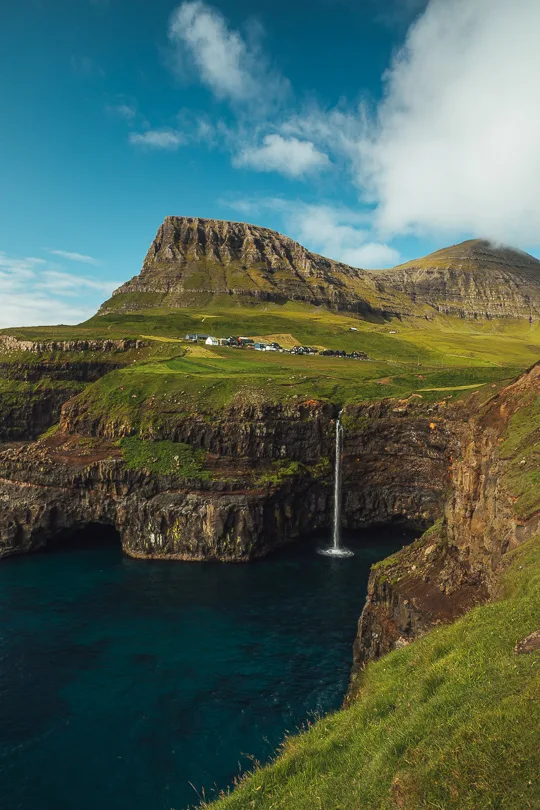


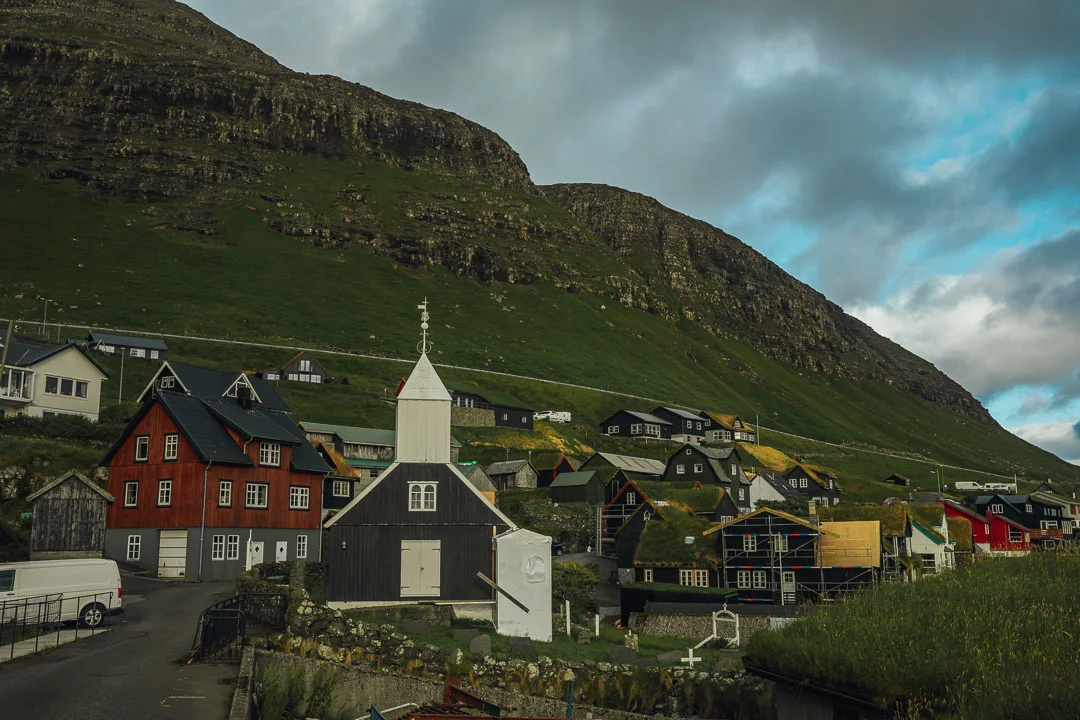
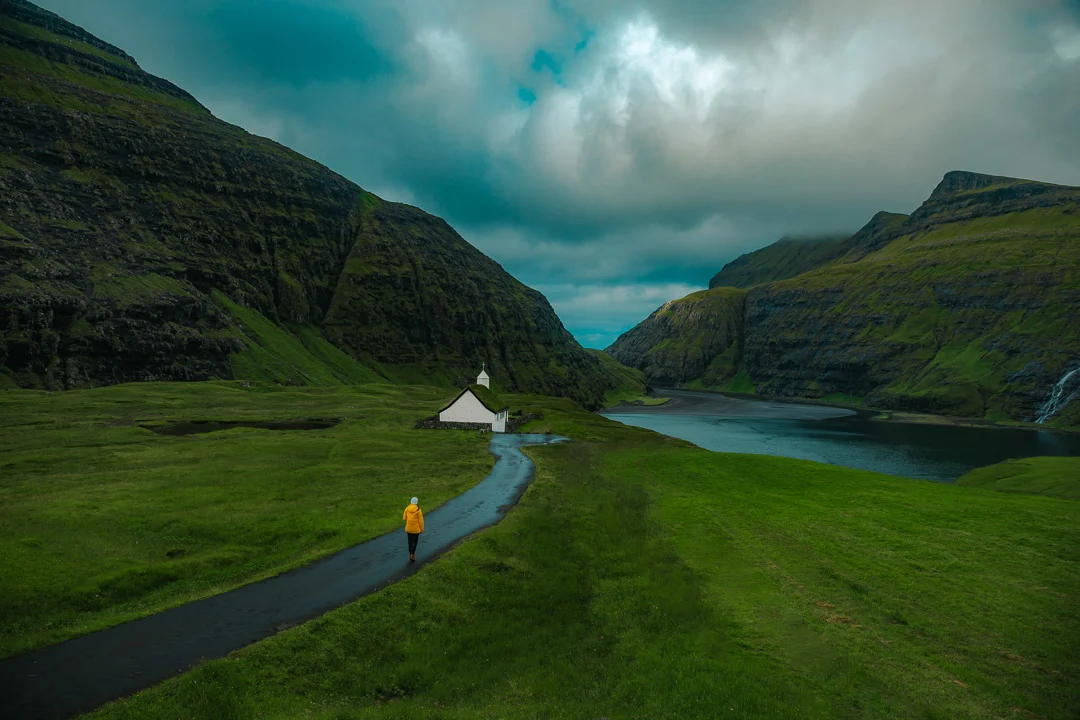
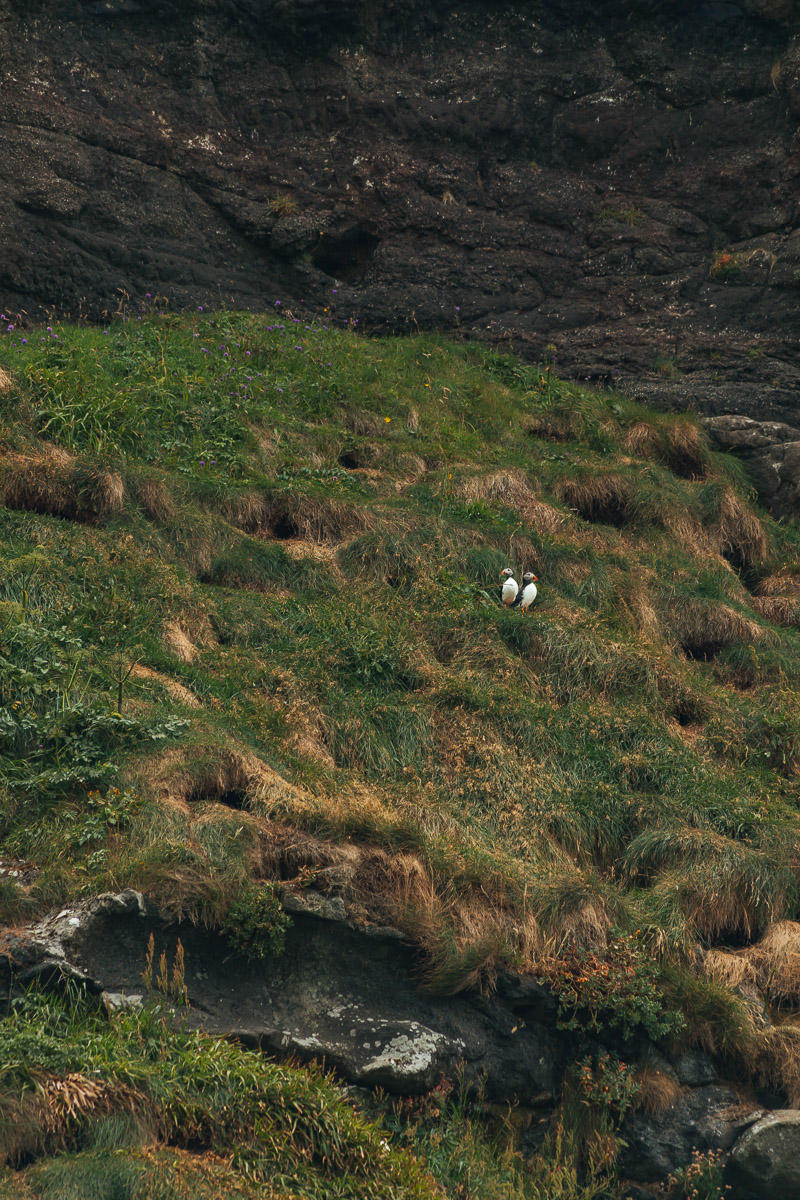
On the first day of this Faroe Islands itinerary, you will stay right next to the famous Mulafossur Waterfall. You can easily photograph it when you arrive, but also during sunset or sunrise. For more tips on what to do in Gásadalur visit this article. Spoiler alert: you can even spot puffins here during summer!
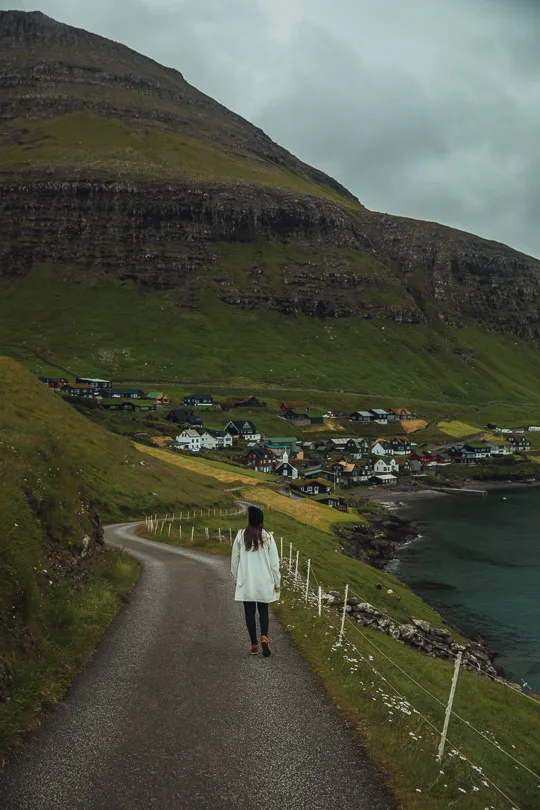
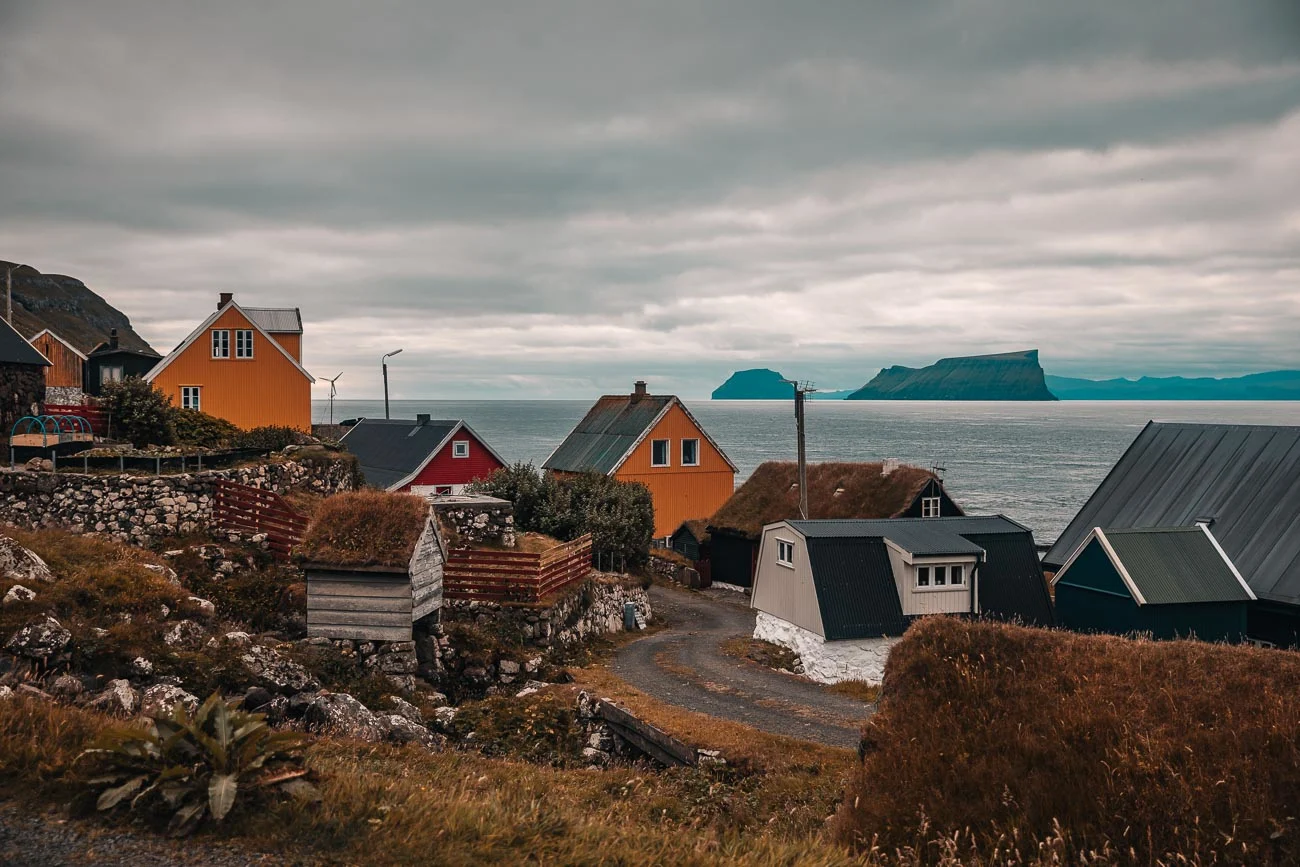
Day 2 – Bøur Village, Trælanípan Lake, Sandavagur Village, Trøllkonufingur and The Nix
After breakfast in your accommodation, you’ll start your journey bright and early and head to Bøur Village. This is just a simple photography stop on your Faroe Islands itinerary, so you’ll need a max of 30 minutes here. Don’t forget to stop by The View cottages as well, the views from there are spectacular!


As you walk through and photograph the beautiful views, make sure you are respectful of people’s privacy here and not photograph into the windows.
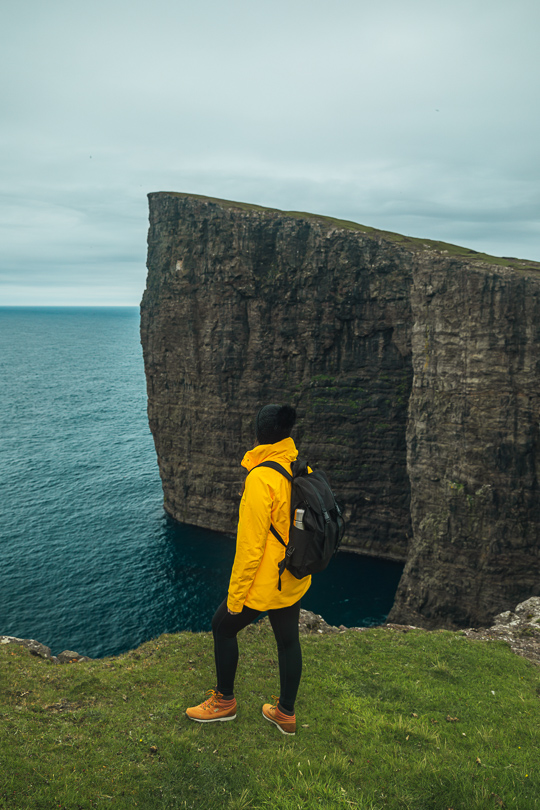
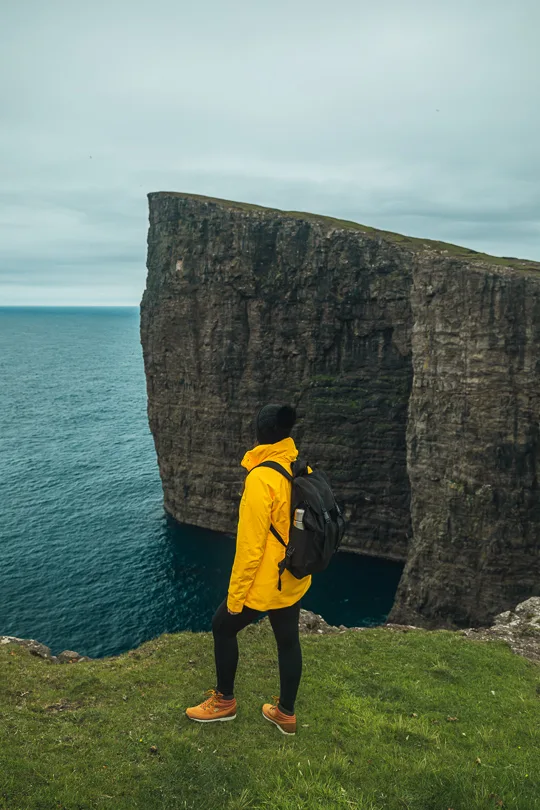
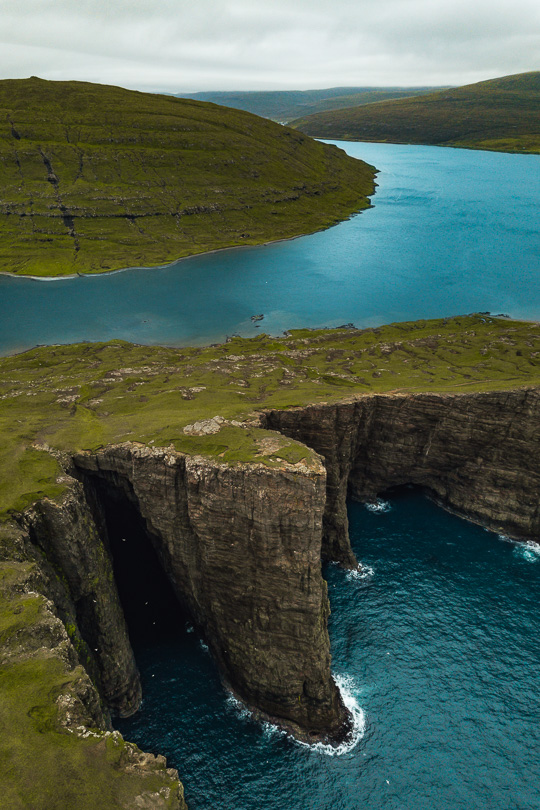
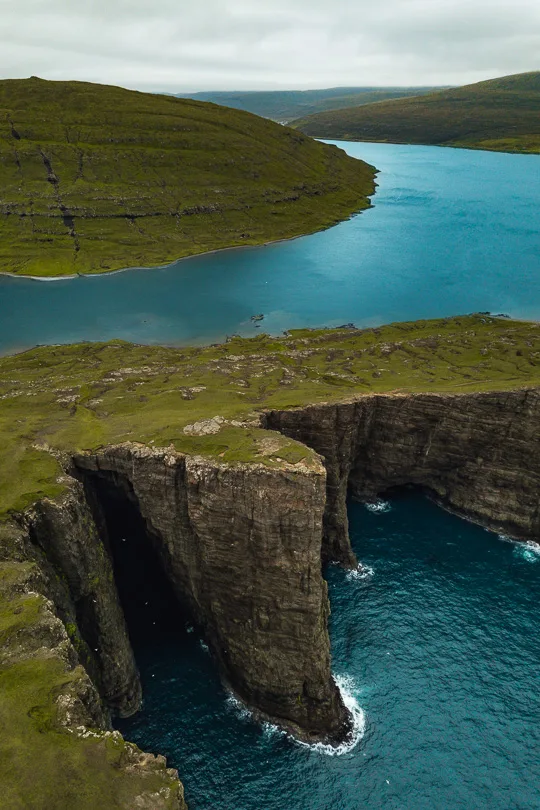
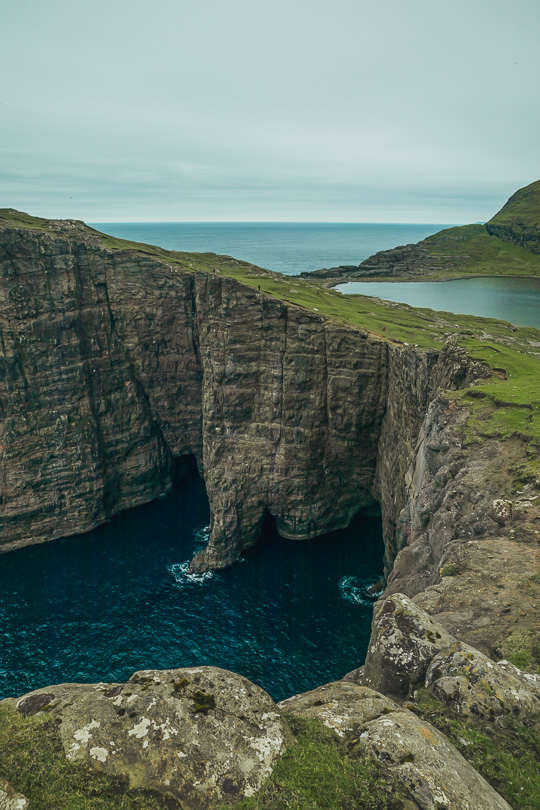
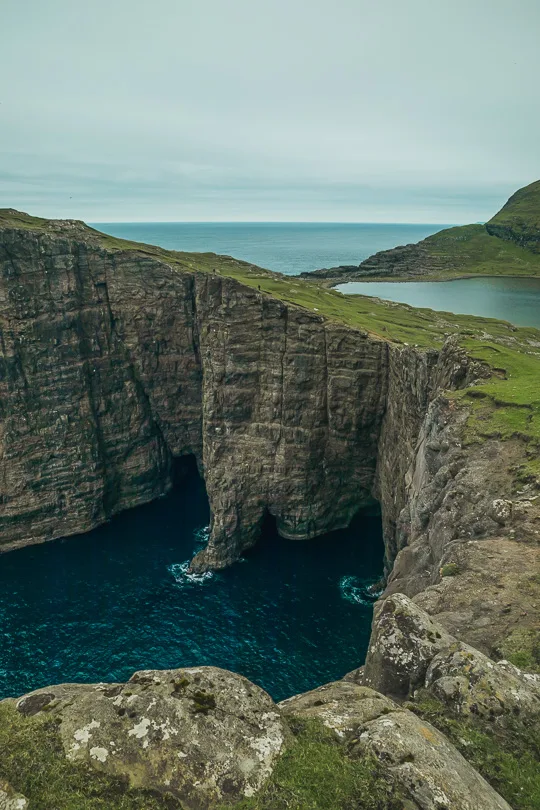
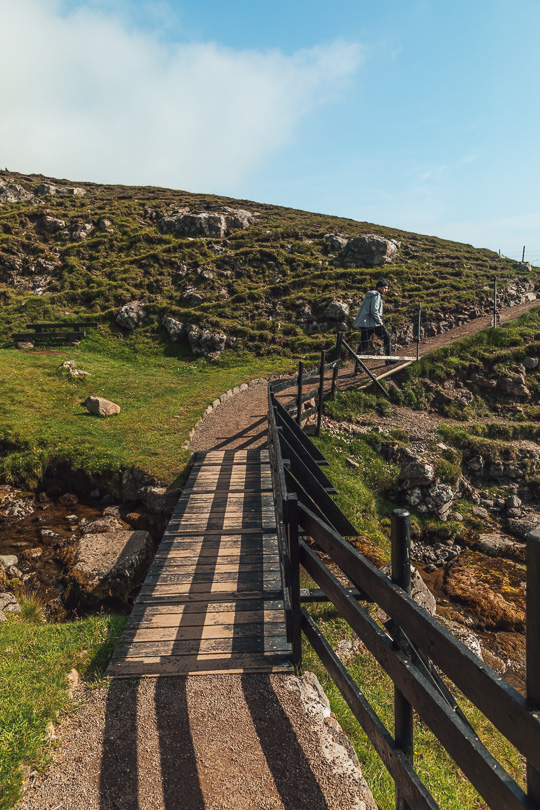
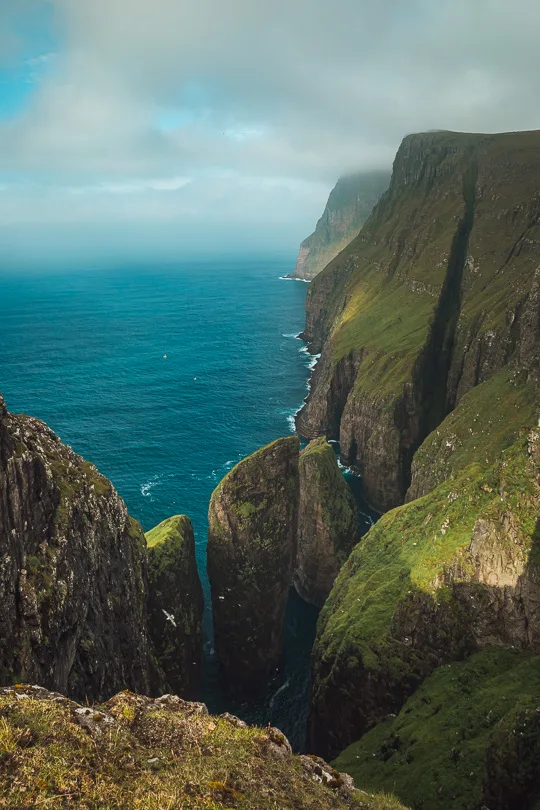
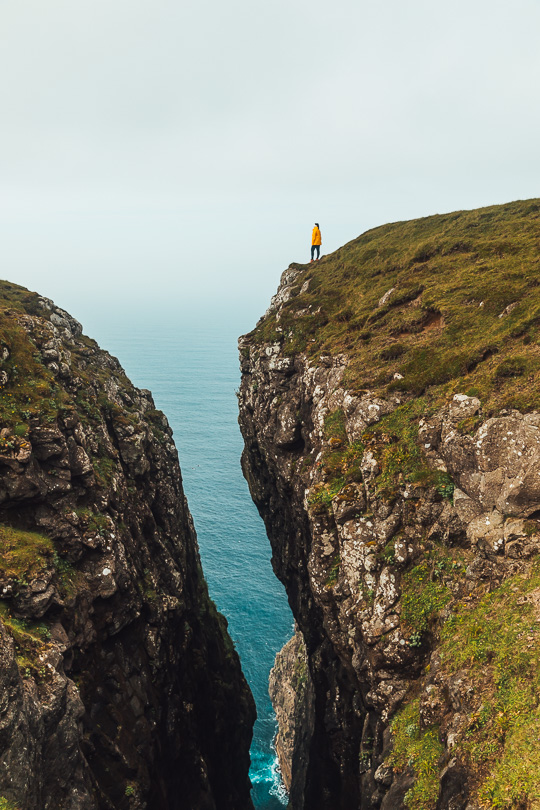
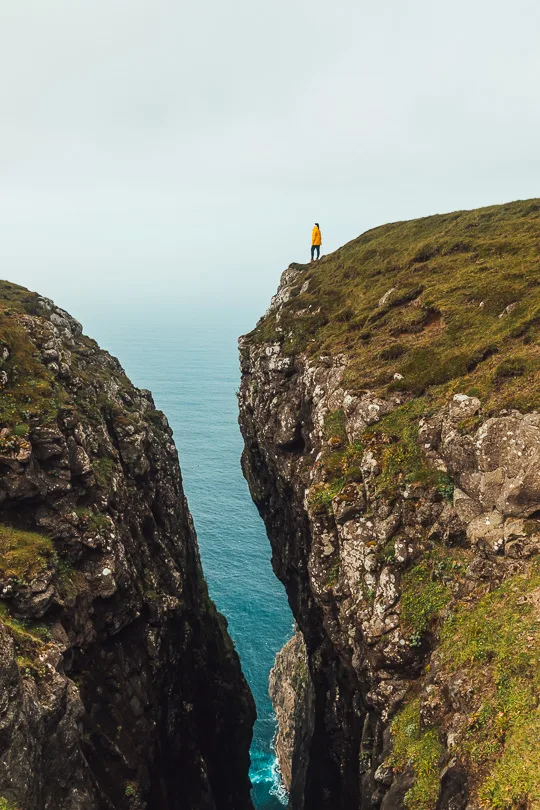
After the short stop at Bøur village, head towardsTrælanípan for a hike to one of the most beautiful views on this entire Faroe Islands itinerary!
Parking is free, but the entrance for the hike is 200 DKK per person since 2019. The hike to Trælanípan is very easy and even suitable for children so you can’t skip this on your Faroe Islands itinerary! The path is quite flat up until the last bit where there is some uphill. Once you reach the top you will be able to see the lake above the ocean. For best photos bring a wide-angle camera. We also had some coffee with us and had a little fika on the top.
You will need, together with photos, approximately 2,5 hours for the trip to Trælanípan.
After you are done here, make the drive towards Sandavagur to see the Faroese church. From here, continue the 5-minute drive towards Trøllkonufingur. Once you park your car, there is a short and easy walk towards the viewpoint of Trøllkonufingur.


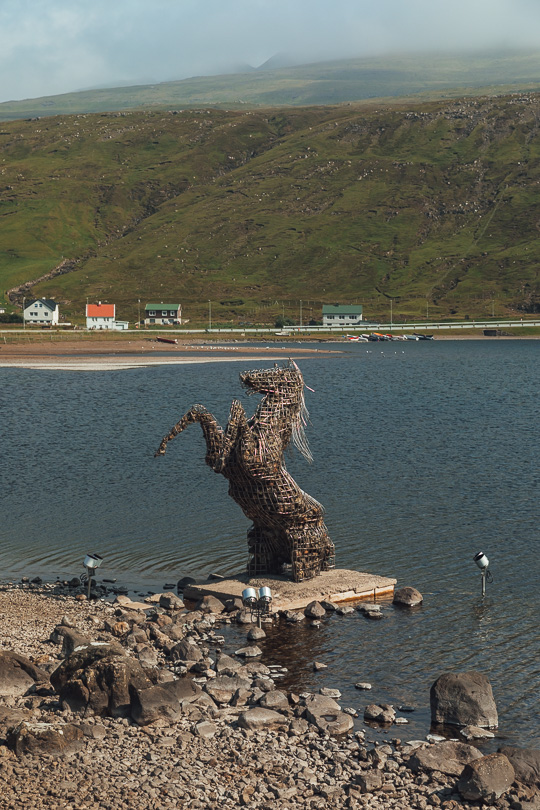
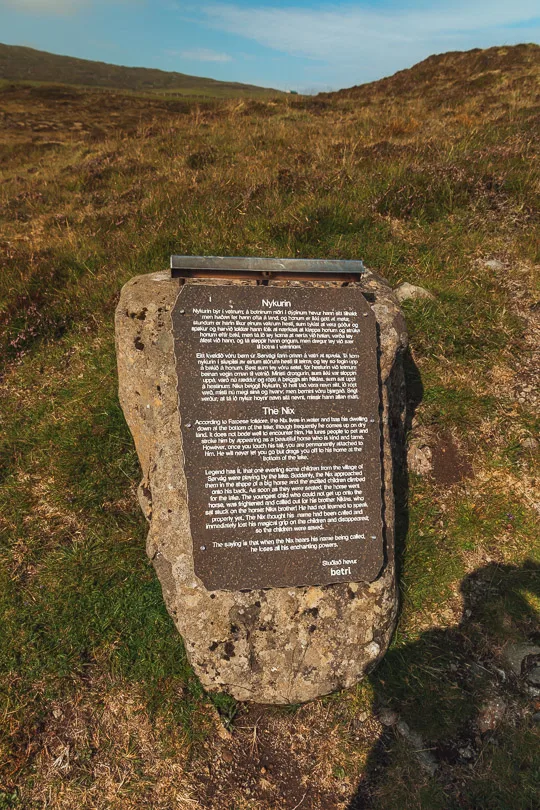
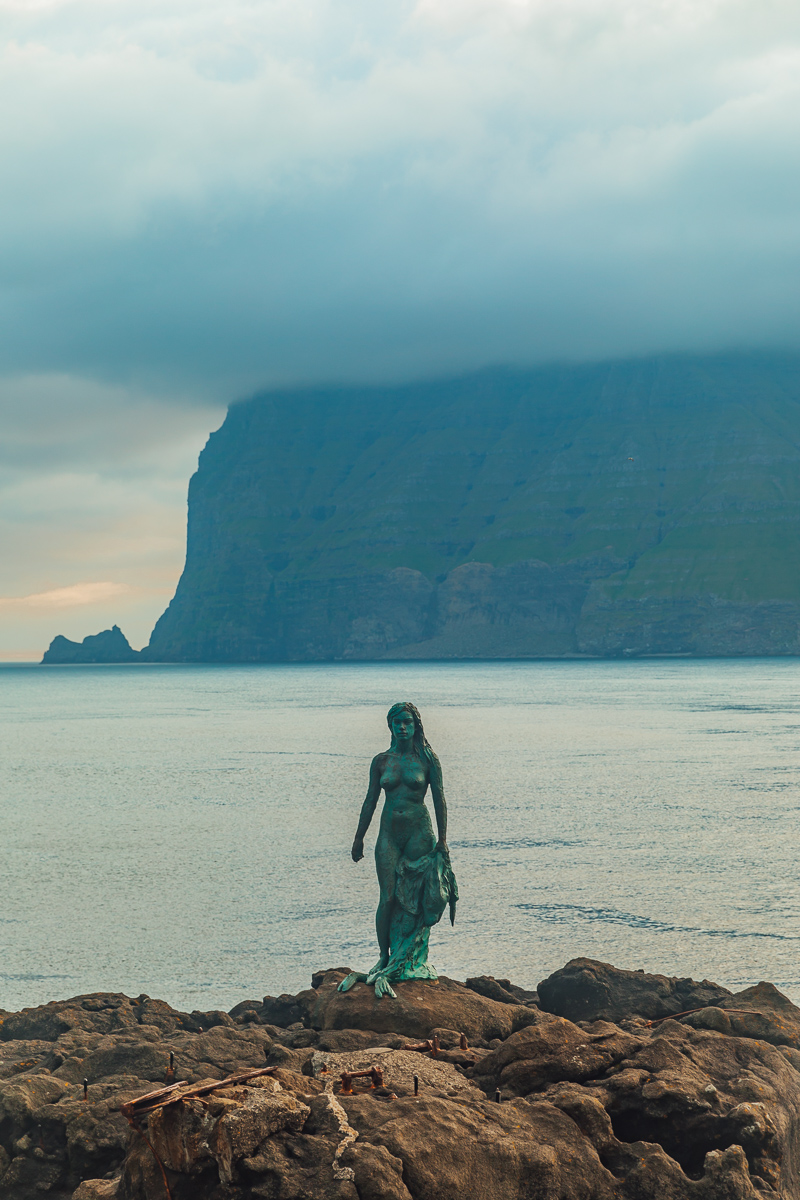
Now that you’ve seen all these beautiful places, drive back to your accommodation in Gásadalur and visit The Nix statue on the way. It’s a wire statue of a horse, peeking out of the lake.


The second day of this Faroe Islands itinerary starts off quite easy, but with plenty of scenic views – hope you enjoyed it!
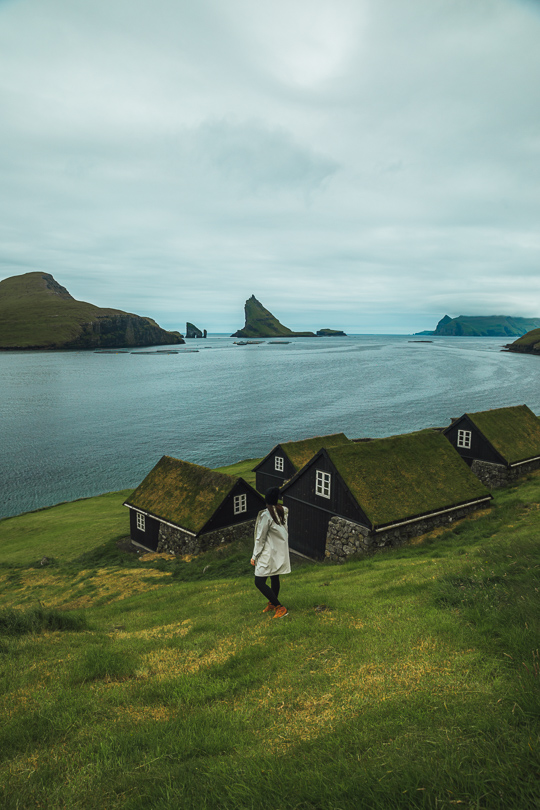
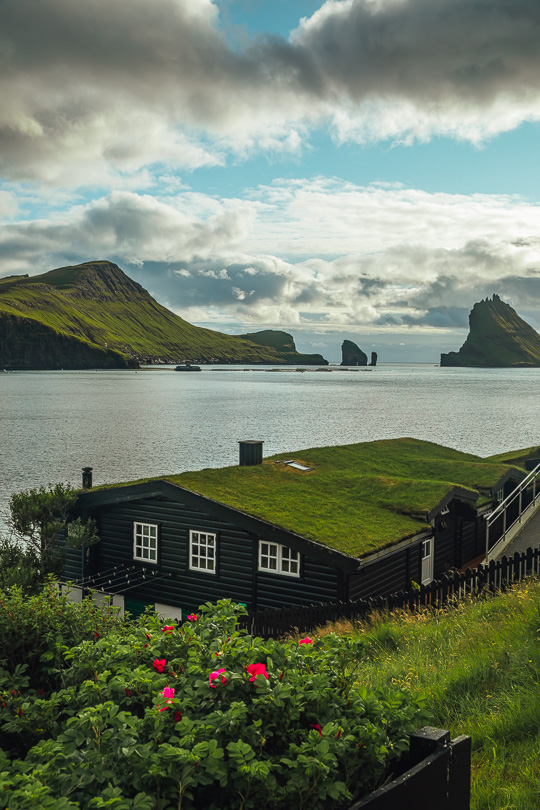
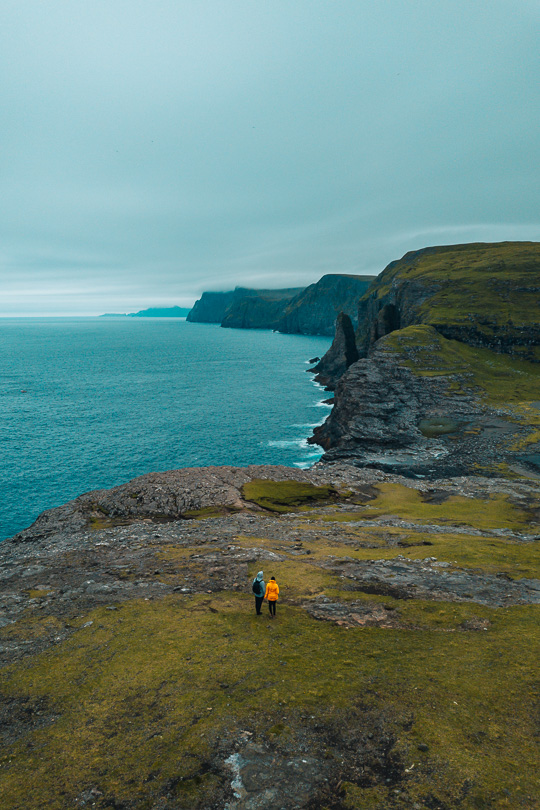
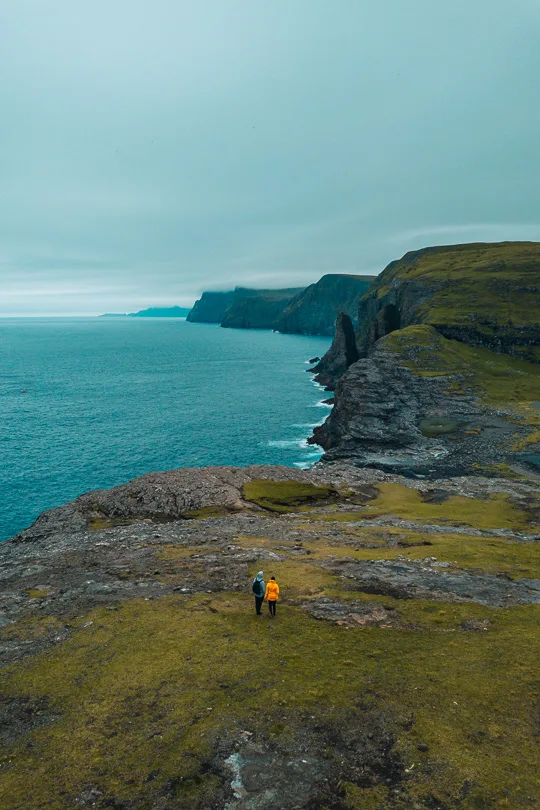
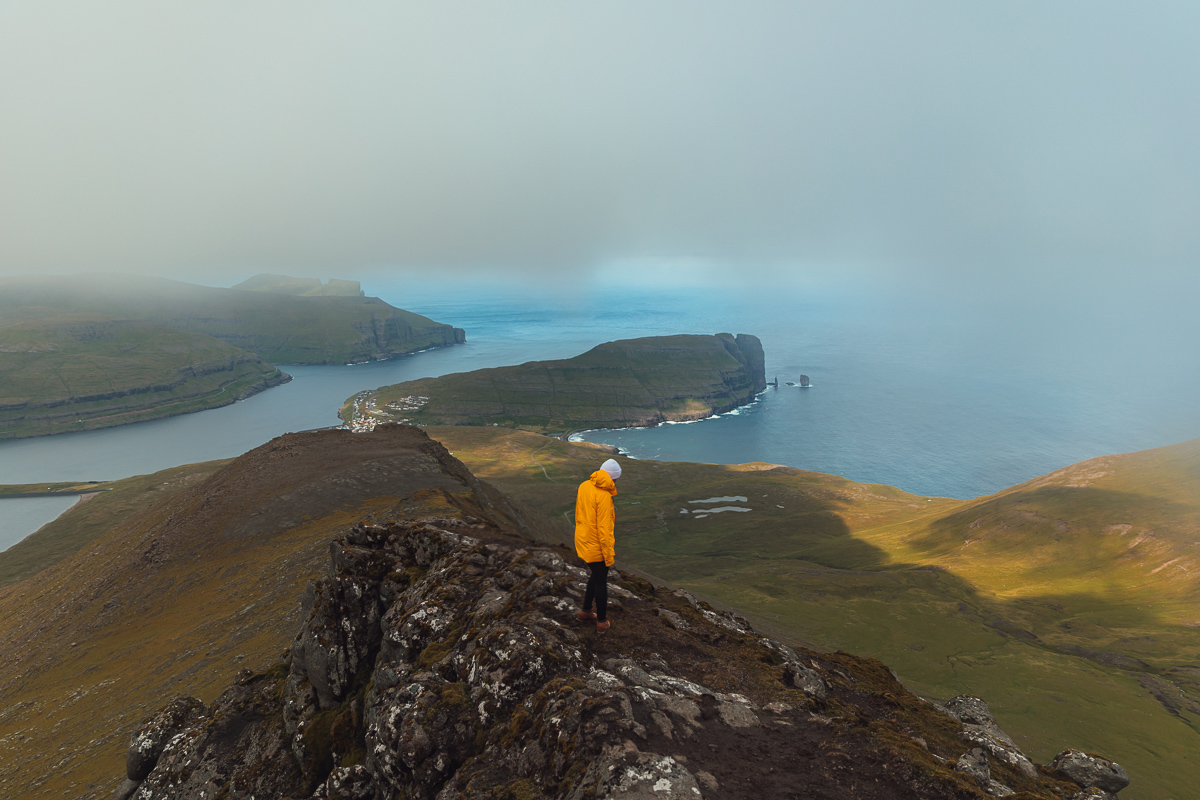
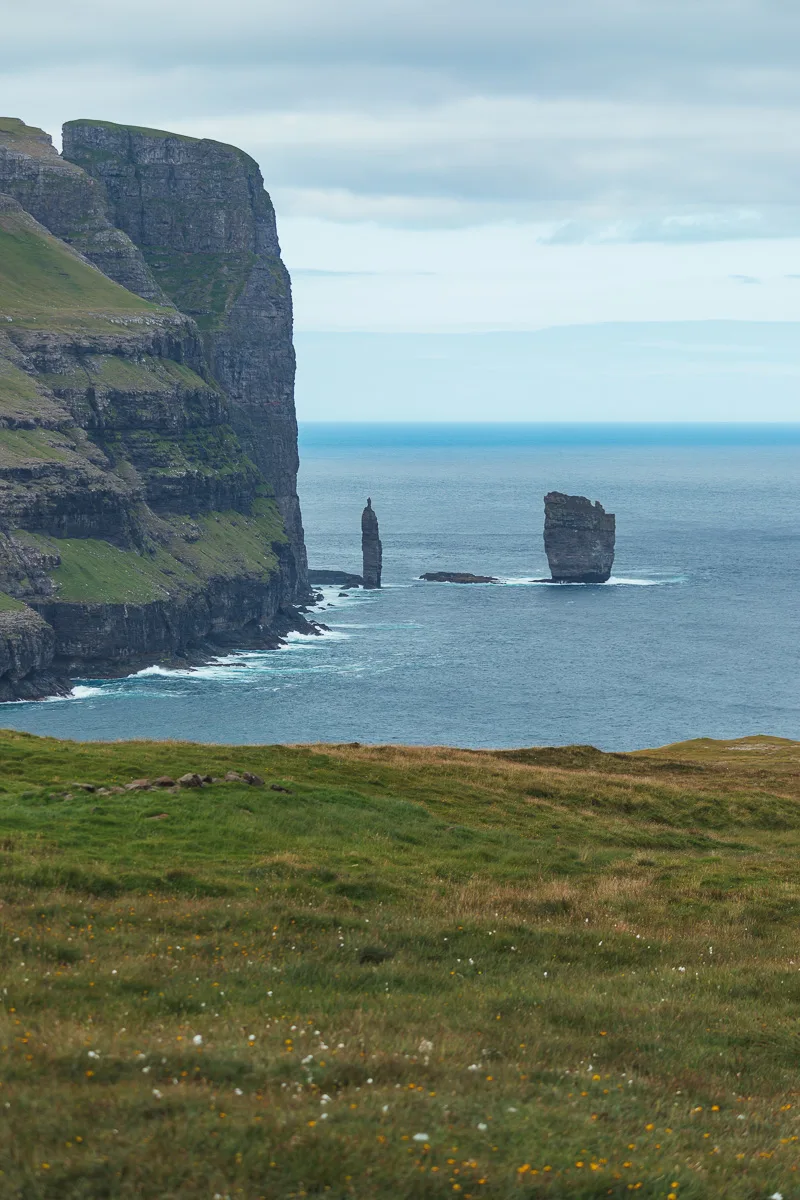
Day 3 – Hike to Drangarnir or Dunnesdrangar, head to Torshavn on Streymoy Island
Drangarnir hike
Today you can choose based on your activity levels (and availability). A hike to Drangarnir was something we weren’t able to do since we weren’t there on the right day, but I really hope we can visit again and go there! The hike there is on private land so the guide is the landowner, you can be fined if you walk here without permission. You can book the hike for Wednesday, Saturday or Sunday here.
The hike to Drangarnir is very difficult and quite expensive, at $75 per person for 5-6 hours. If you want to take the easier trip there, then you could also book a boat trip there, which will take you a lot less time (and effort).
Dunnesdrangar hike
If you’re not up to the Drangarnir challenge, then something even more beautiful awaits on Vágar island – Dunnesdrangar! This hidden gem is now becoming more recognized and lands on many people’s Faroe Islands itinerary. You now have to book a hike in advance and you can do it right here. The hike here is easy, guided and takes about 3 hours both ways.


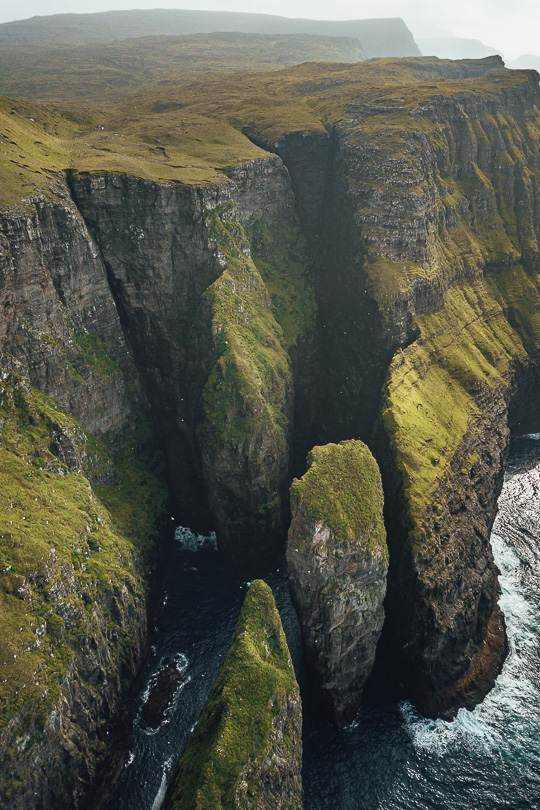

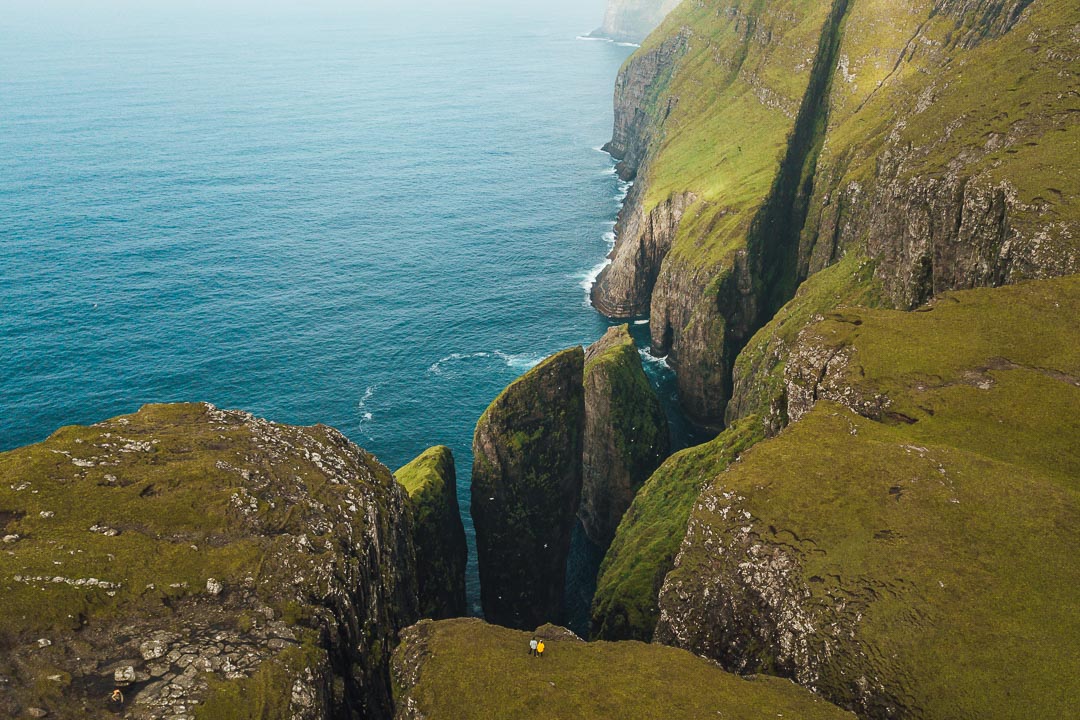

Dunnesdrangar was my ultimate favorite thing to do on this Faroe Islands itinerary. It was absolutely beautiful and we were the only ones there (together with a new friend Cat who we met in the parking lot).
After you are done with either option, head to Tórshavn. The journey to Tórshavn from Vágar takes about 45 minutes and you will be driving through a tunnel. This Faroe Islands itinerary is planned so you’ll only need to drive through each tunnel once (there and back). This tunnel fee is 100 DKK and you can pay it online here.

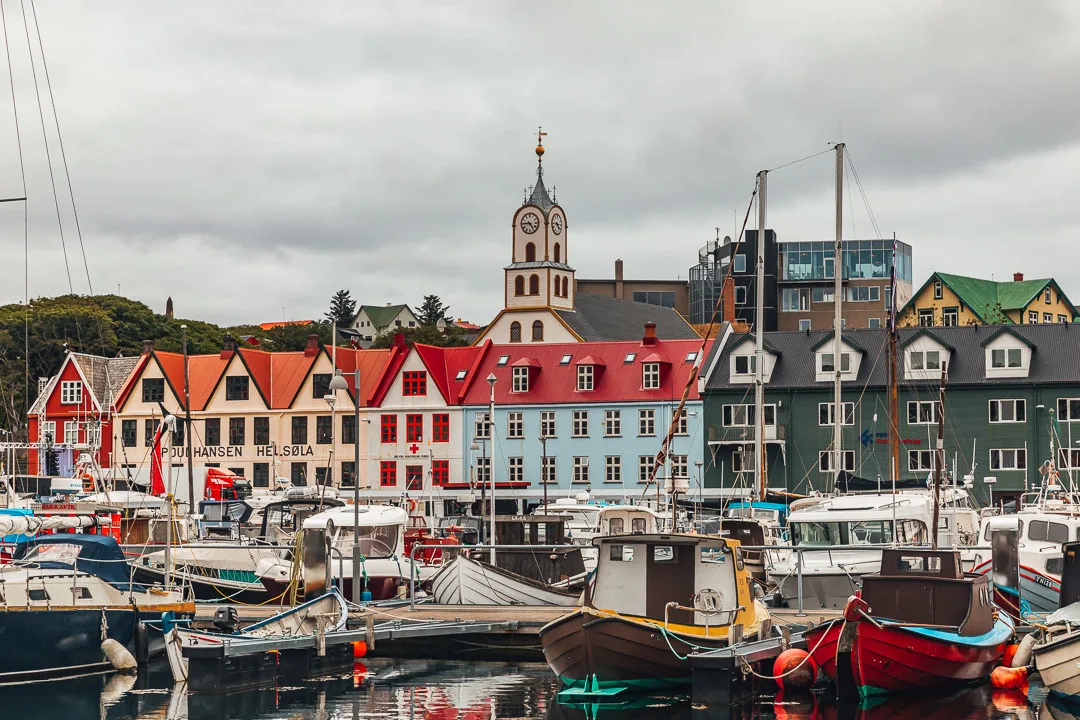
Tórshavn
Book a place close to the marina in Tórshavn, this way you can park at the big parking lot which is free most of the time. Head to the supermarket for some groceries for the upcoming days and get ready for an adventure around the city.

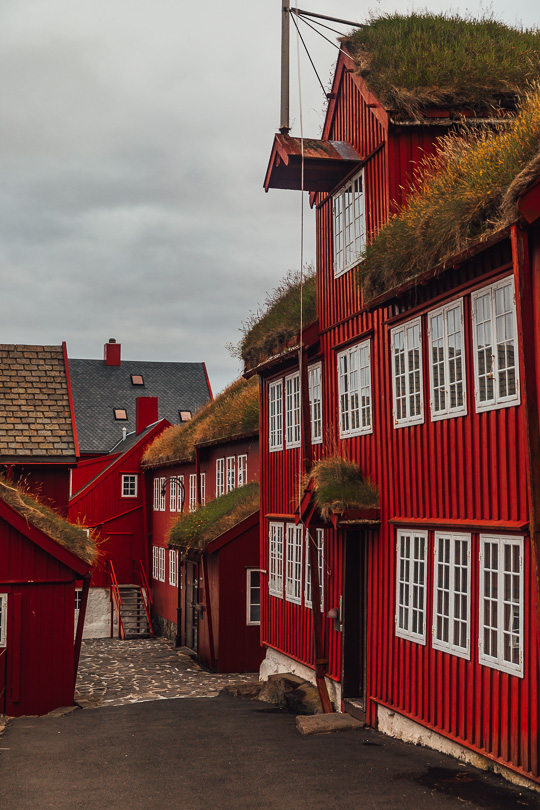
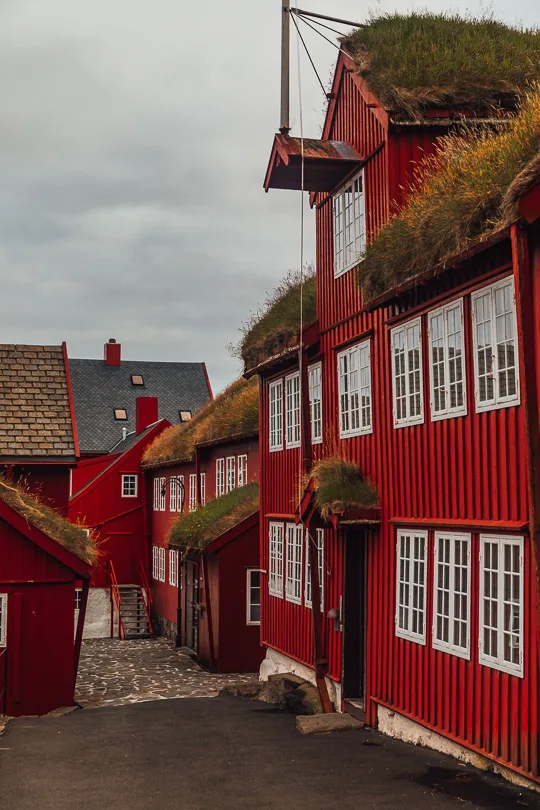
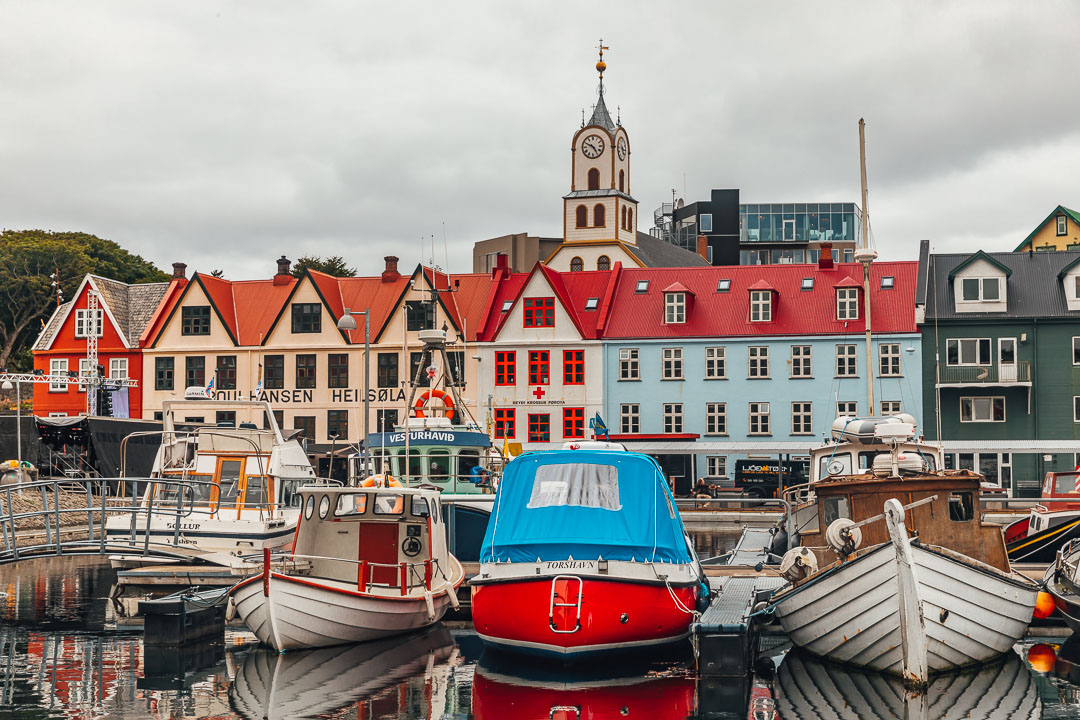

Stroll around the marina for a bit before heading out to a restaurant. This is the only place you can really eat out so if you are craving something this is where you can get it! See all my tips for restaurants and more things to do in Tórshavn here.
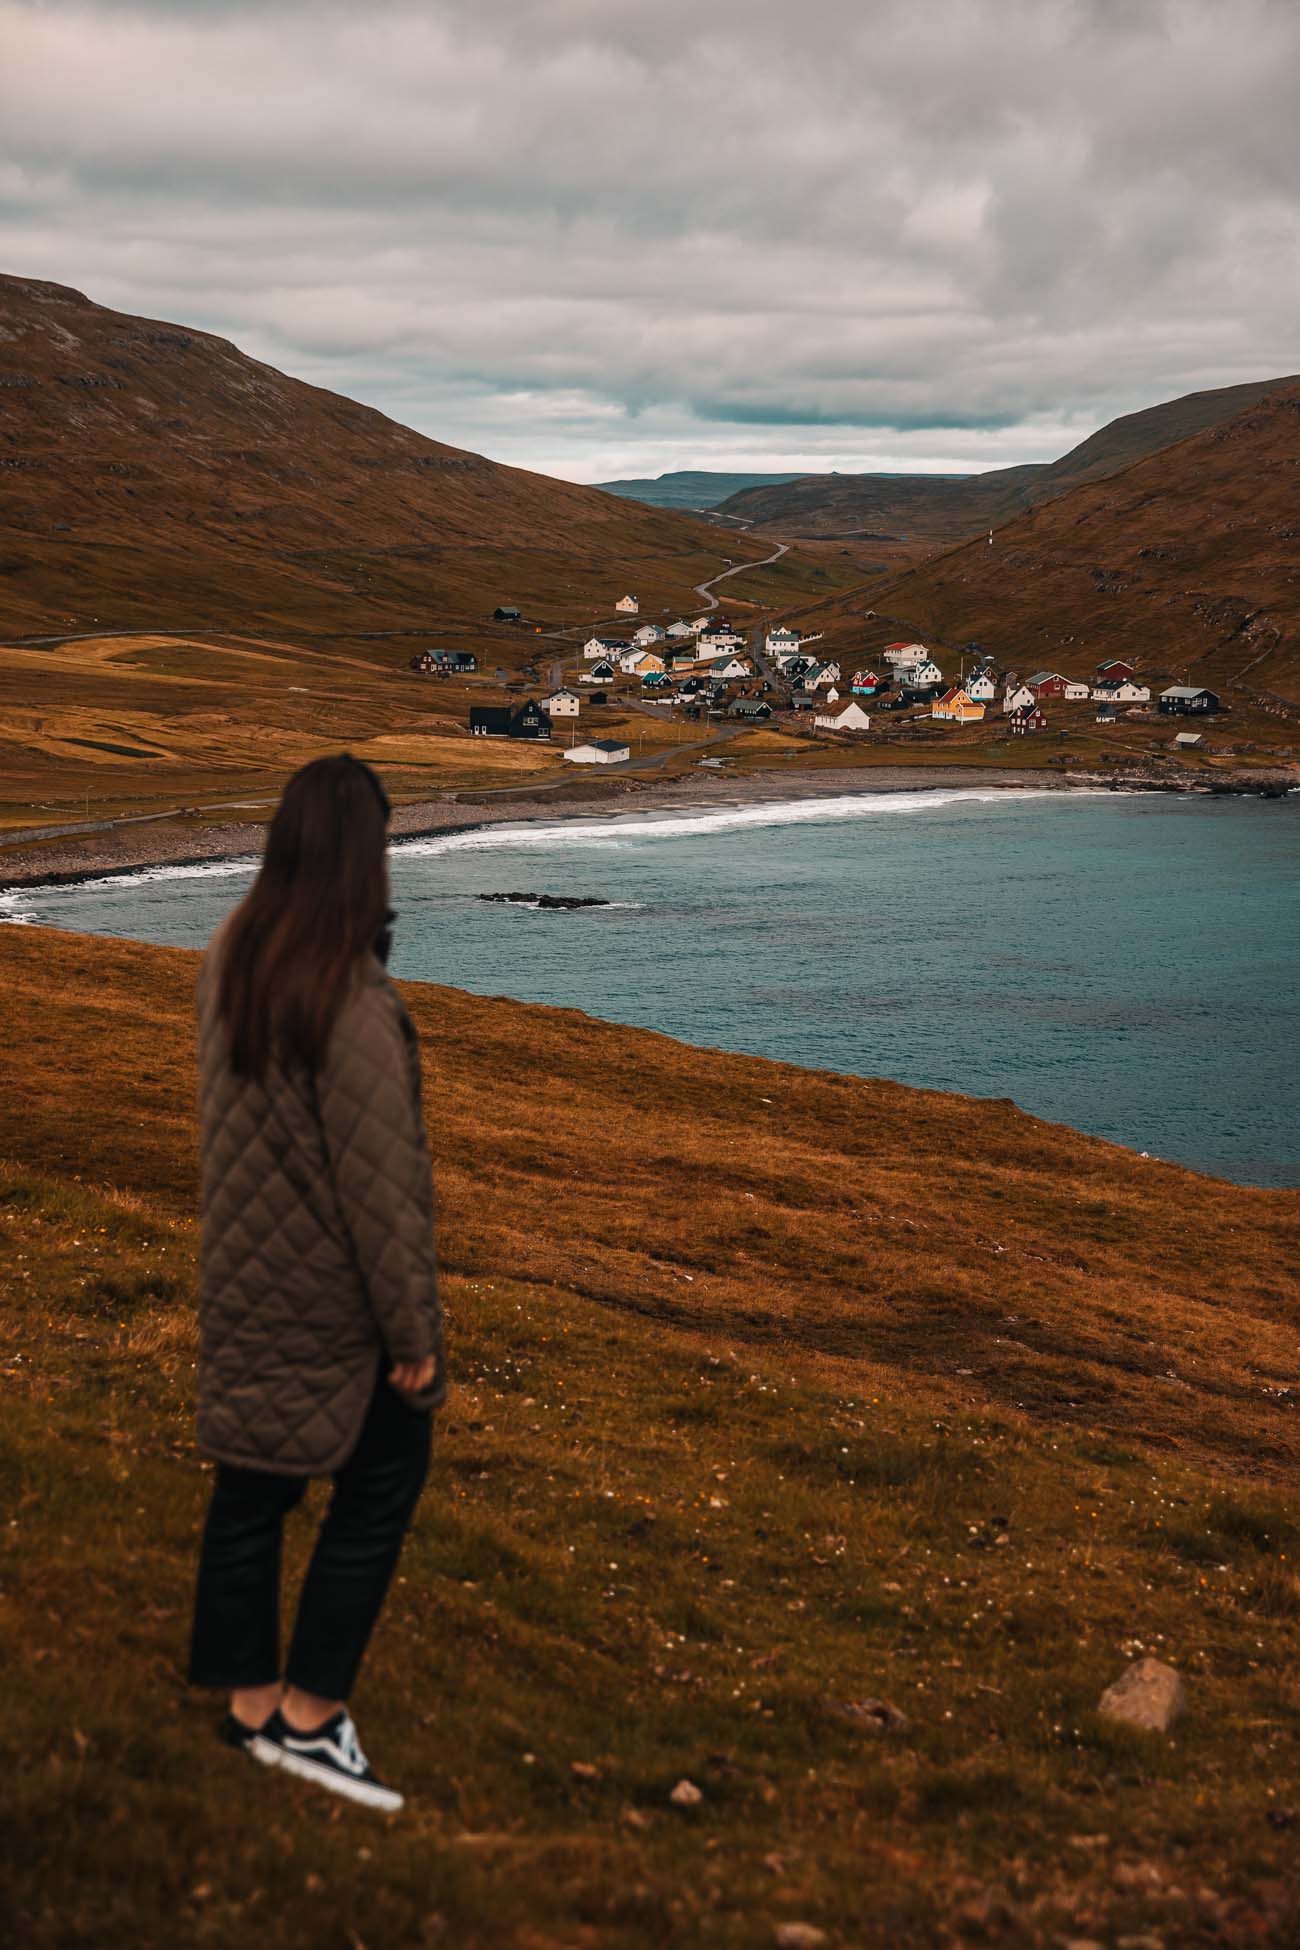
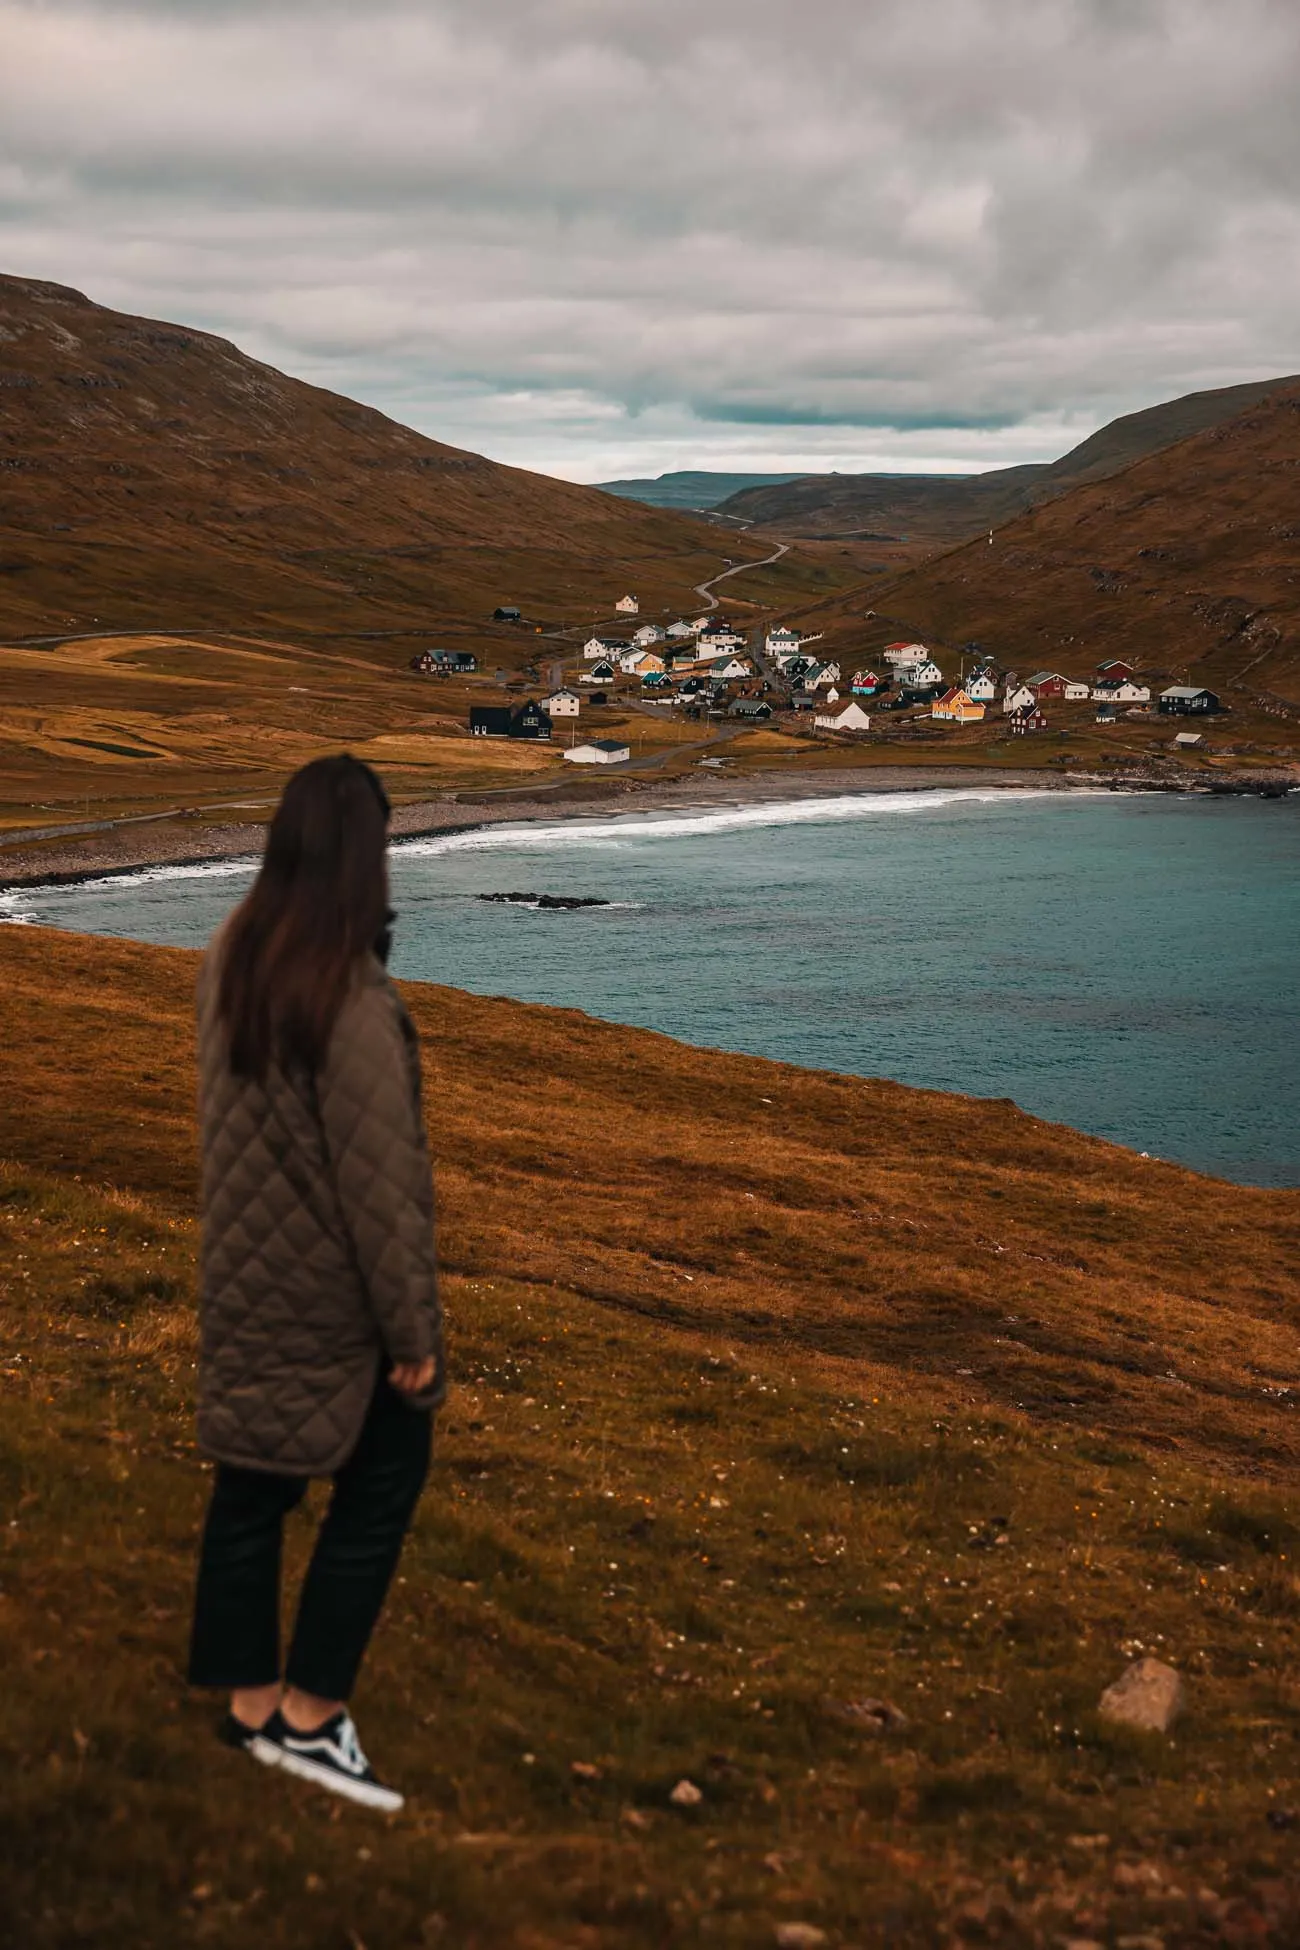
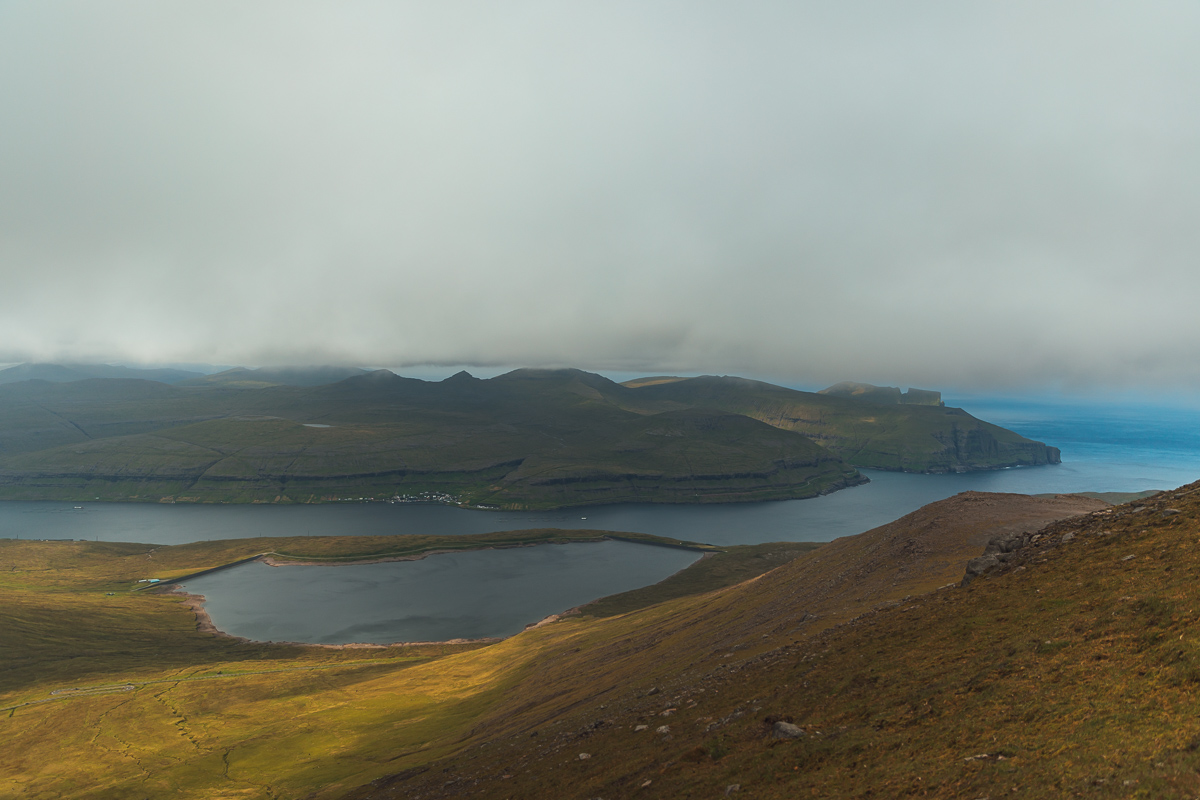
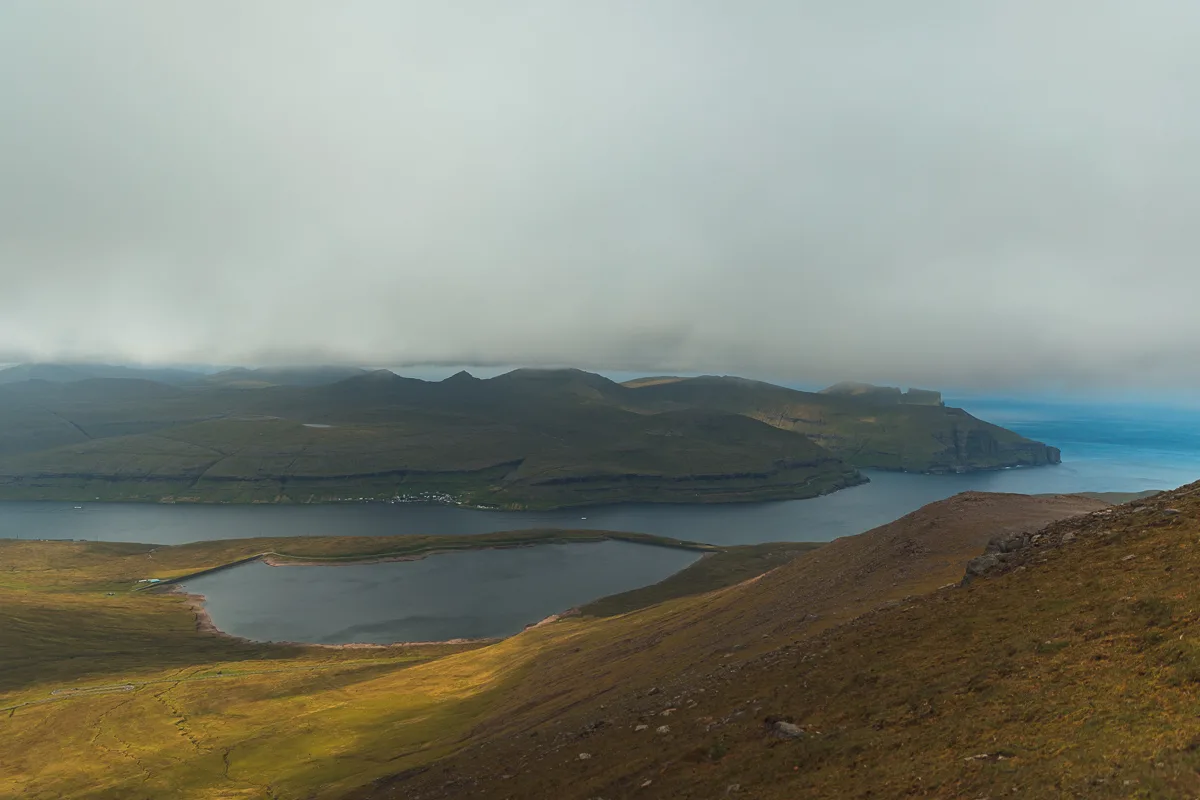
Day 4 – Streymoy Island: Saksun to Tjornuvik hike
Have a hearty breakfast today because the hike you have coming up today is tough! Begin your day early and drive up to Saksun to hike to Tjornuvik. You can park your car here and try and hitch a ride back once you make it to the other side (what we did). There is no convenient public transport to take you back to your car after the 4-5 hour hike.
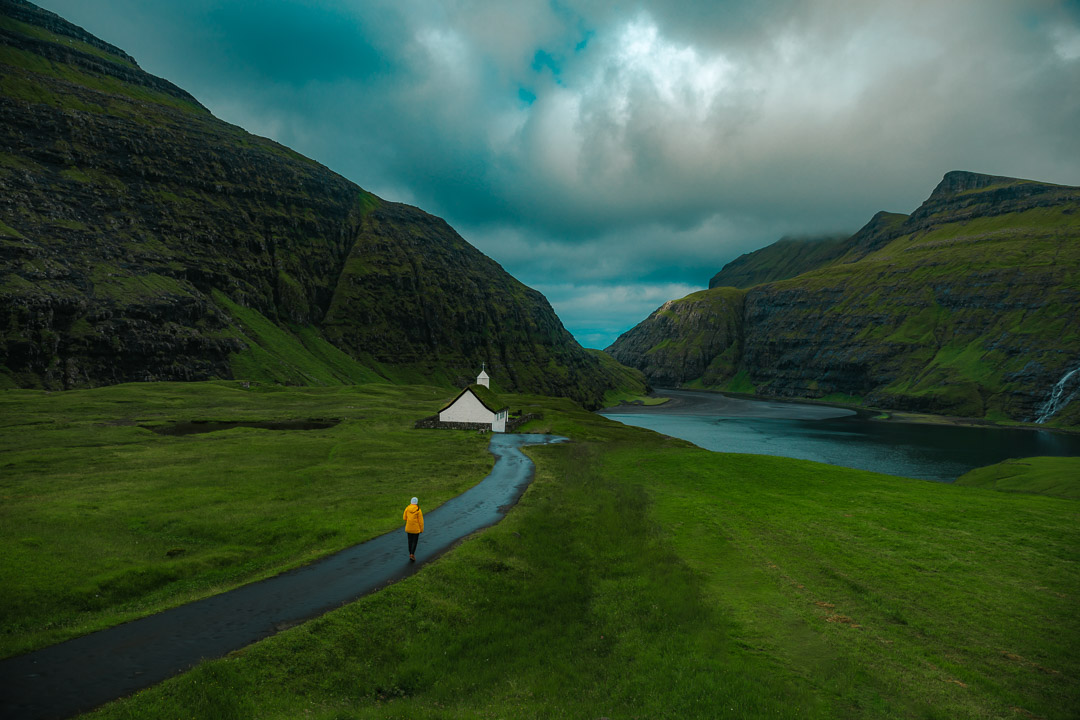
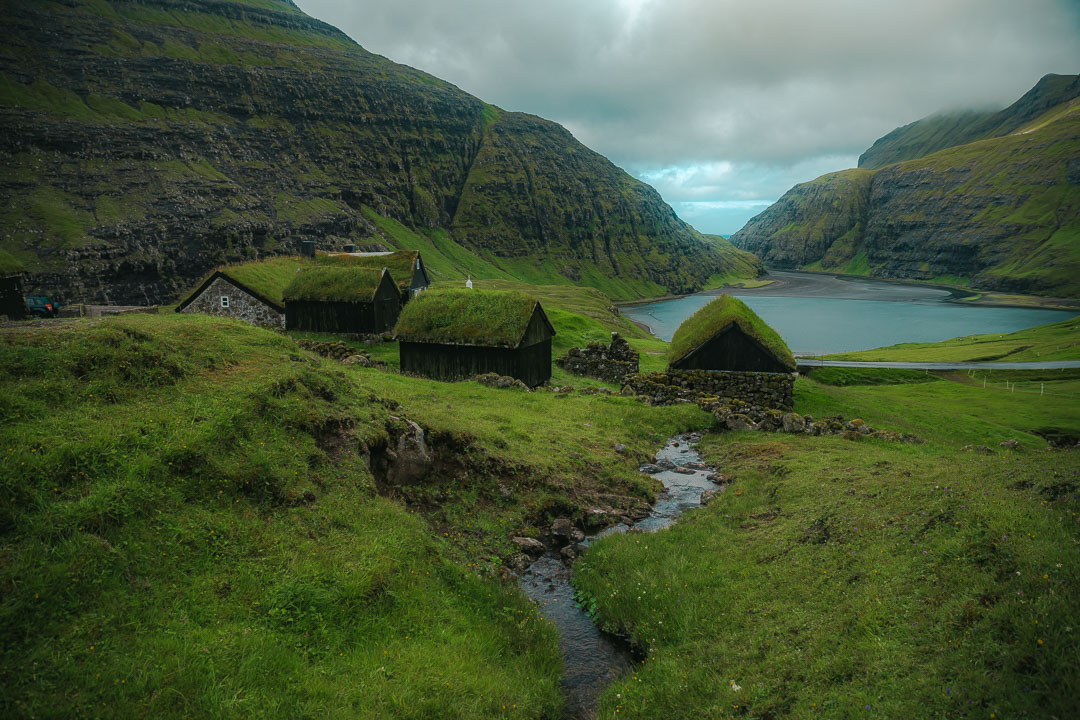
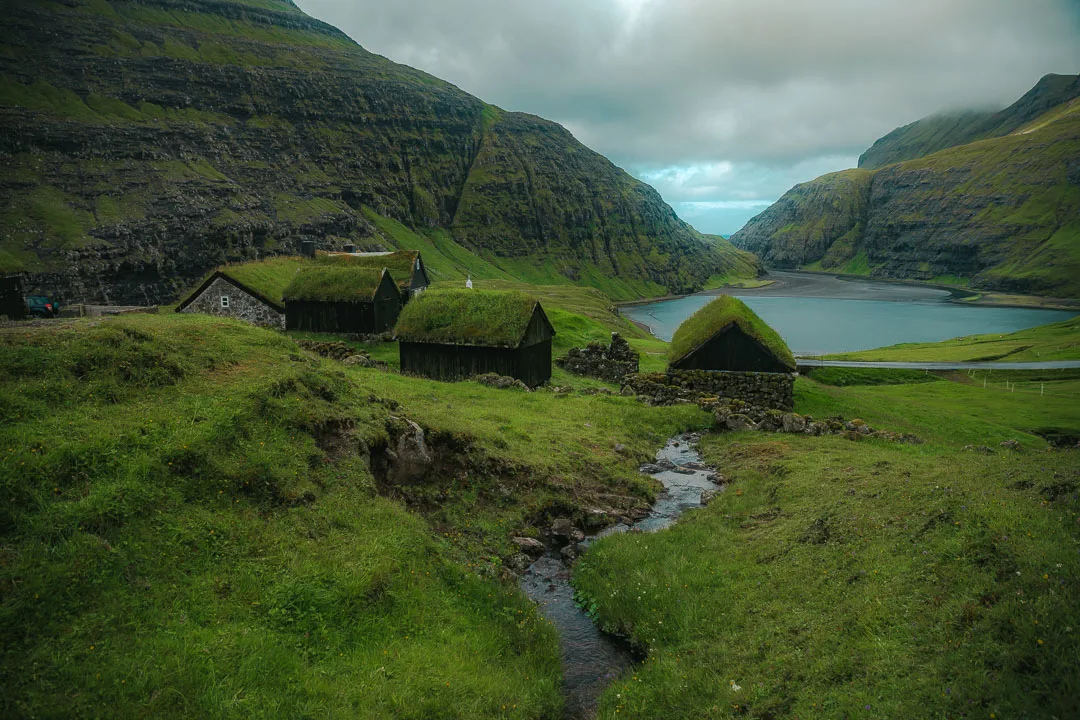

If you are not much of a hiker, then I have an even better suggestion for you (what I wish we did): go to Saksun and take pictures of this stunning village from the bottom. It really is not better from the top and in my opinion, this hike is not worth the trouble.
Then hop into your car and drive to Tjornuvik. There you will want to go higher up for that amazing viewpoint of the village. The hike up here is difficult, but it’s worth the trip! Then head back down, hop in your car and you’re done! The path in between the villages is super foggy, there’s not much to see and unless you’re really into hiking it’s not worth it. Thank me in the comments 😉
After you’re done with both, look at some villages you pass. There are plenty of beautiful spots on the way back to Tórshavn.
Day 5 – Day trip to Sandoy island
If you’re keen on exploring some not-so-touristy islands in the Faroe Islands, then make sure you plan a day trip to Sandoy. It’s easily reachable with a ferry from Gamlaraett to Skopun.
Book the ferry here, with a car spot for 160DKK for the car with driver +40 DKK for each passenger in the car. The ferry ride takes about 30 minutes and I recommend you take one in the morning at 8 am, see the schedule here.

I wrote a detailed guide to Sandoy and the best things to do there in this article. Since Sandoy is not so big, you only need about 6 hours there, which means you can head back when it’s still light outside. If you manage, then visit Kirkjubour Village – it’s very charming! If you don’t manage today, then you can also do it the day after.
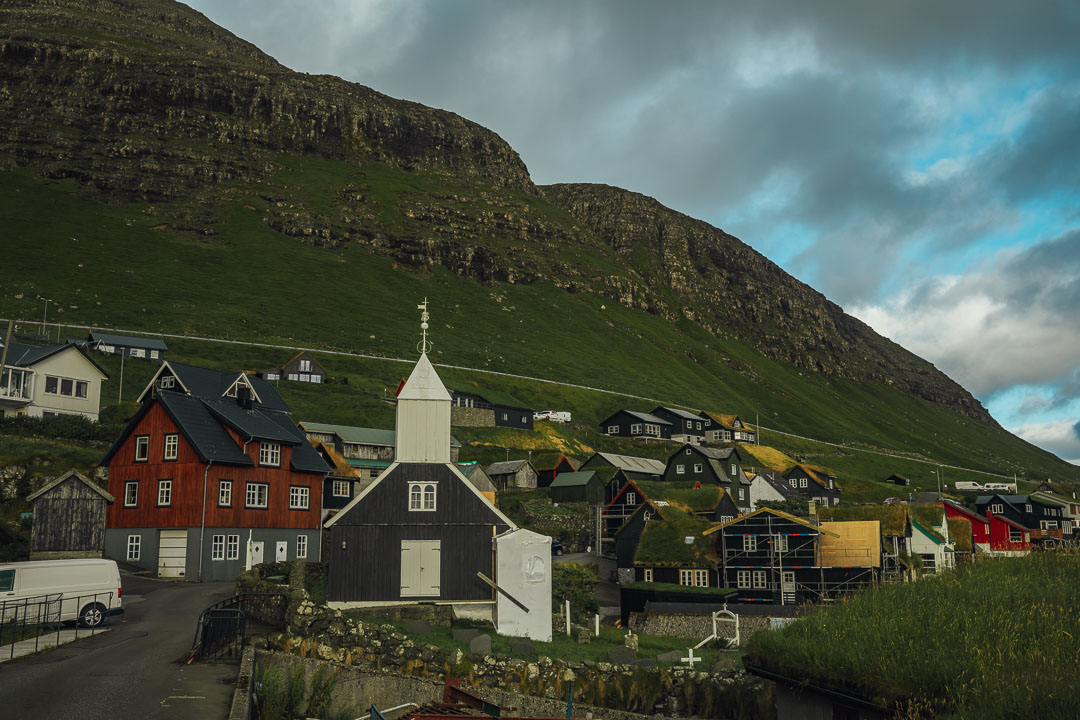
Day 6 – Kirkjubøur Village, head to Eysturoy Island and hike from Oyndarfjørður to Elduvik
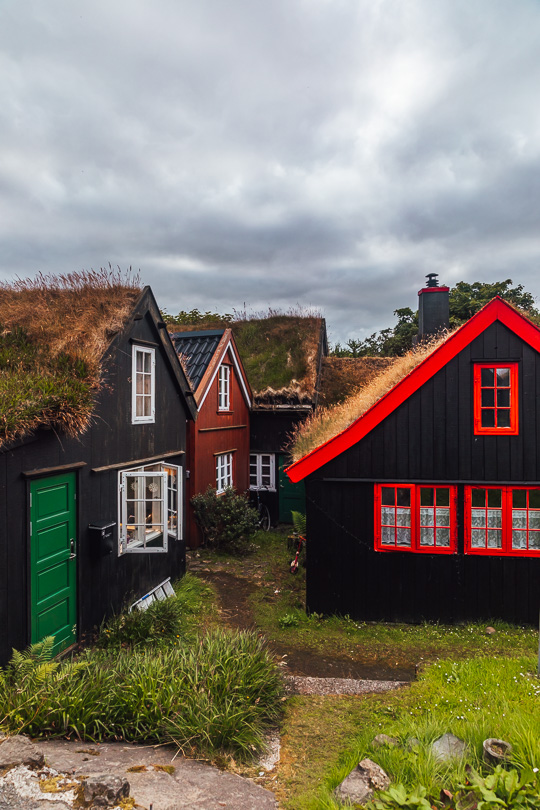
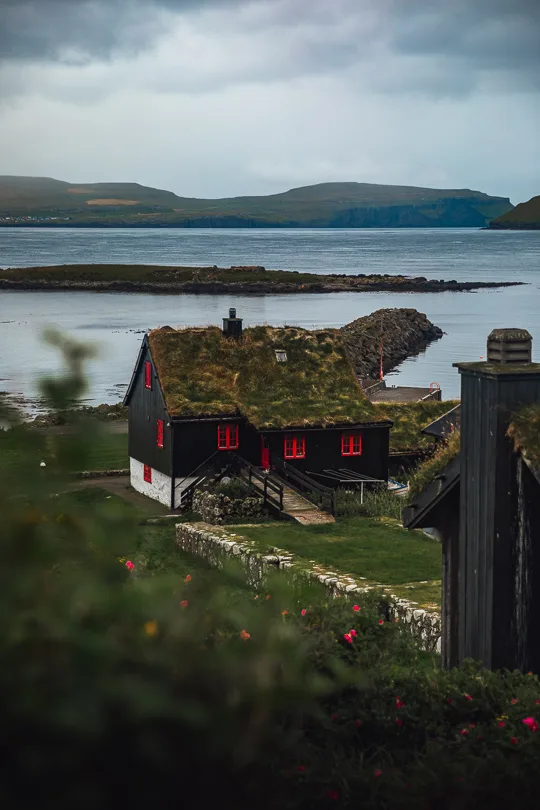
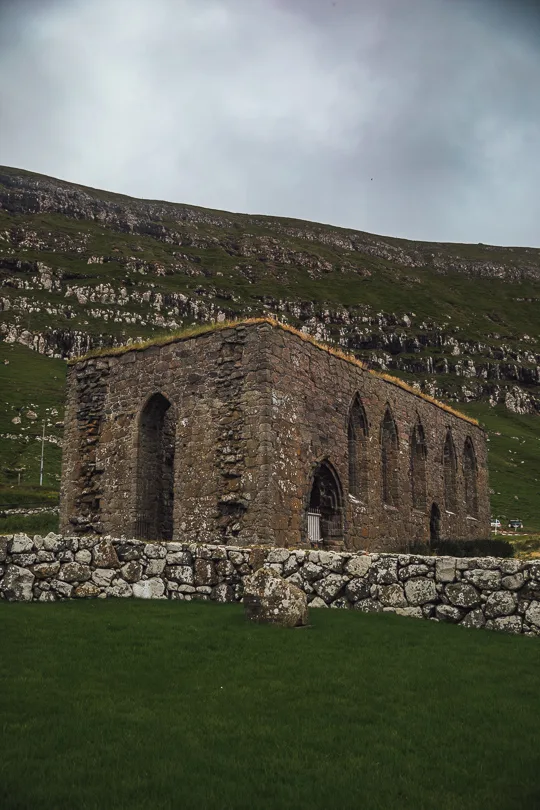
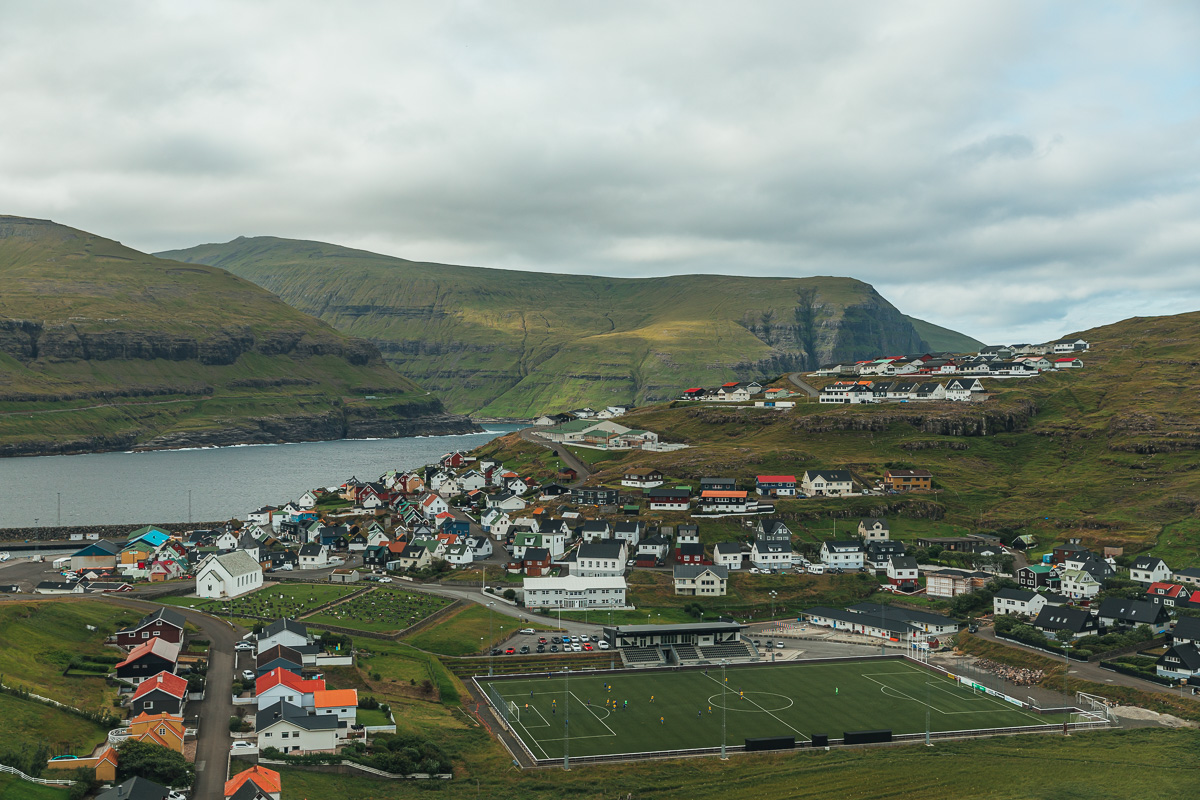
If you didn’t manage to visit the charming Kirkjubøur Village yesterday, then head there this morning after breakfast. This village is Streymoy’s most southern village and also the Faroes’ most important historical site. Here you will see a church, charming houses and ruins of the Magnus Cathedral from around 1300. It was one of my favorites on this Faroe Islands itinerary.


After that drive towards the town called Gøtugjógv for checking into your new accommodation. You could pick another location on this island, we chose here because of its central location. Head to the supermarket which is located here and get some food for your meals.

Since the hike from Oyndarfjørður isn’t tough or long, you can easily do this before the day ends as well. On this hike, you will some beautiful views of the villages and the neighboring islands.
There is a pretty cool tunnel with a roundabout between Streymoy and Eysturoy and it costs 200 DKK (both ways) to cross it. Make sure you take the right turn towards the right side of Eysturoy.
TIP: In case you only have a week to visit Faroe Islands and aren’t too keen on making plans and transport yourself, here is a 6-day organized summer tour you could also take!
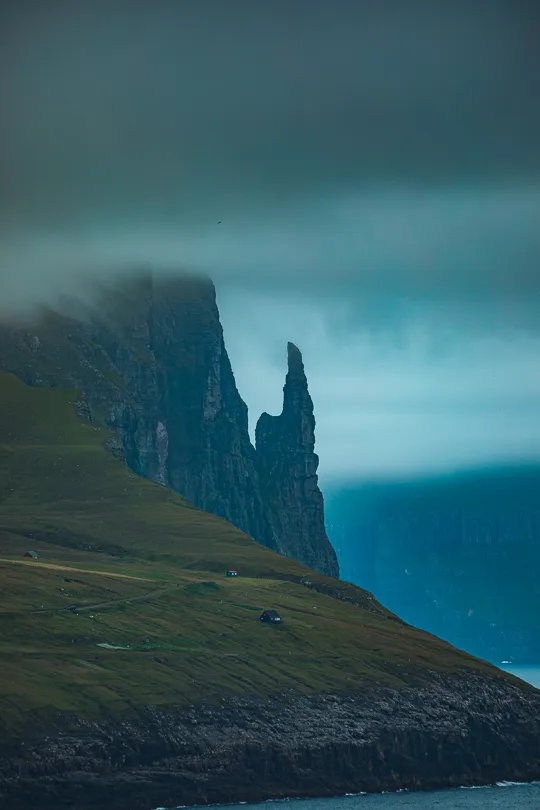
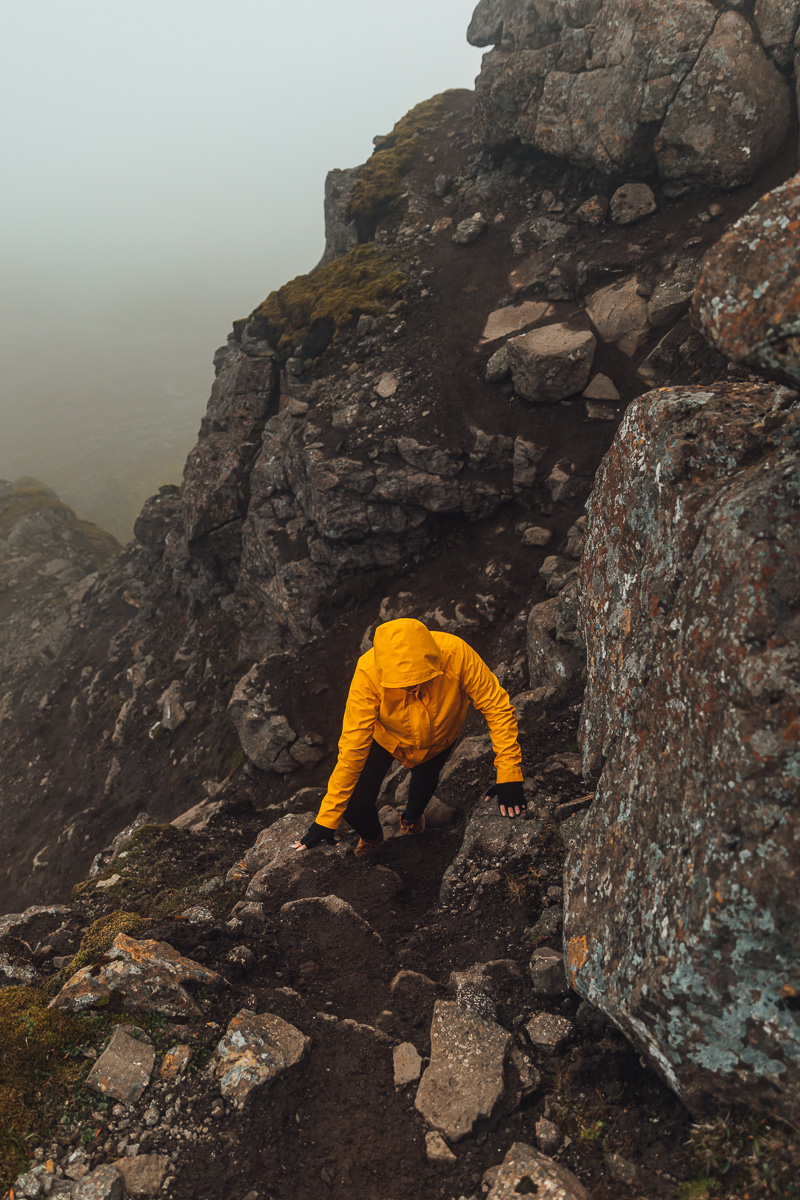
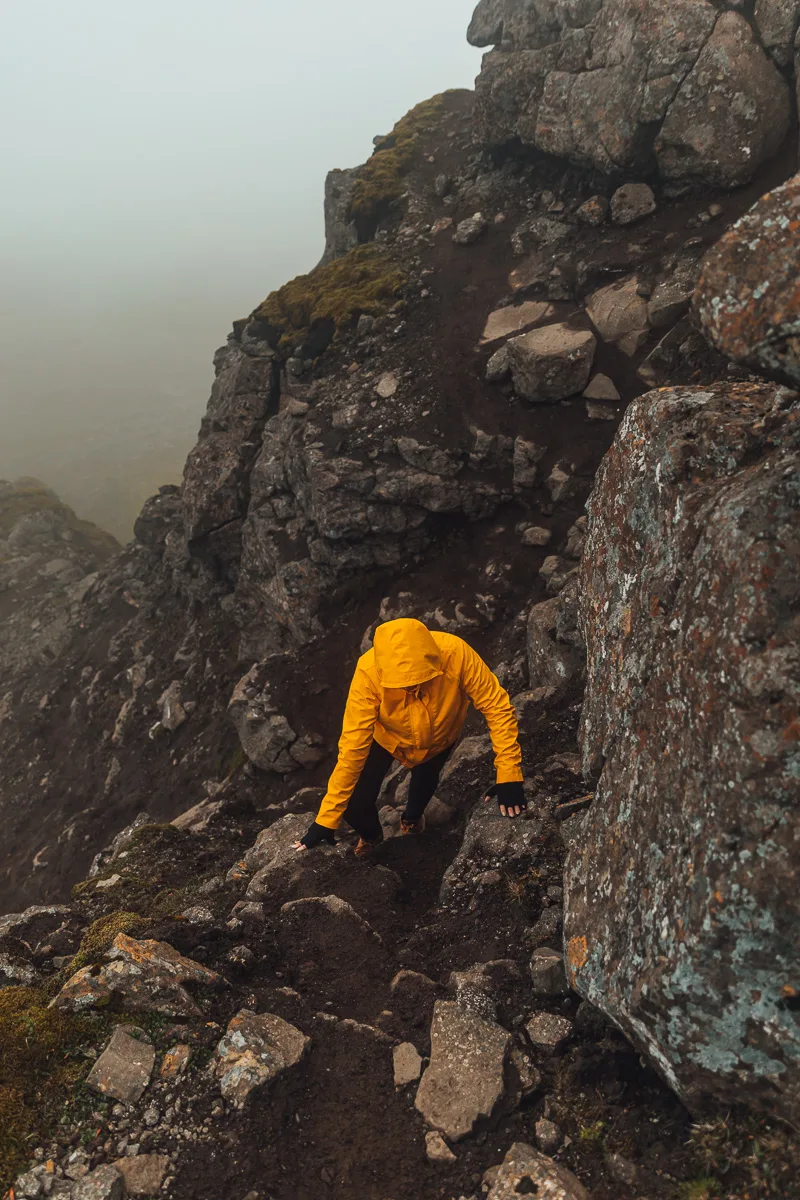
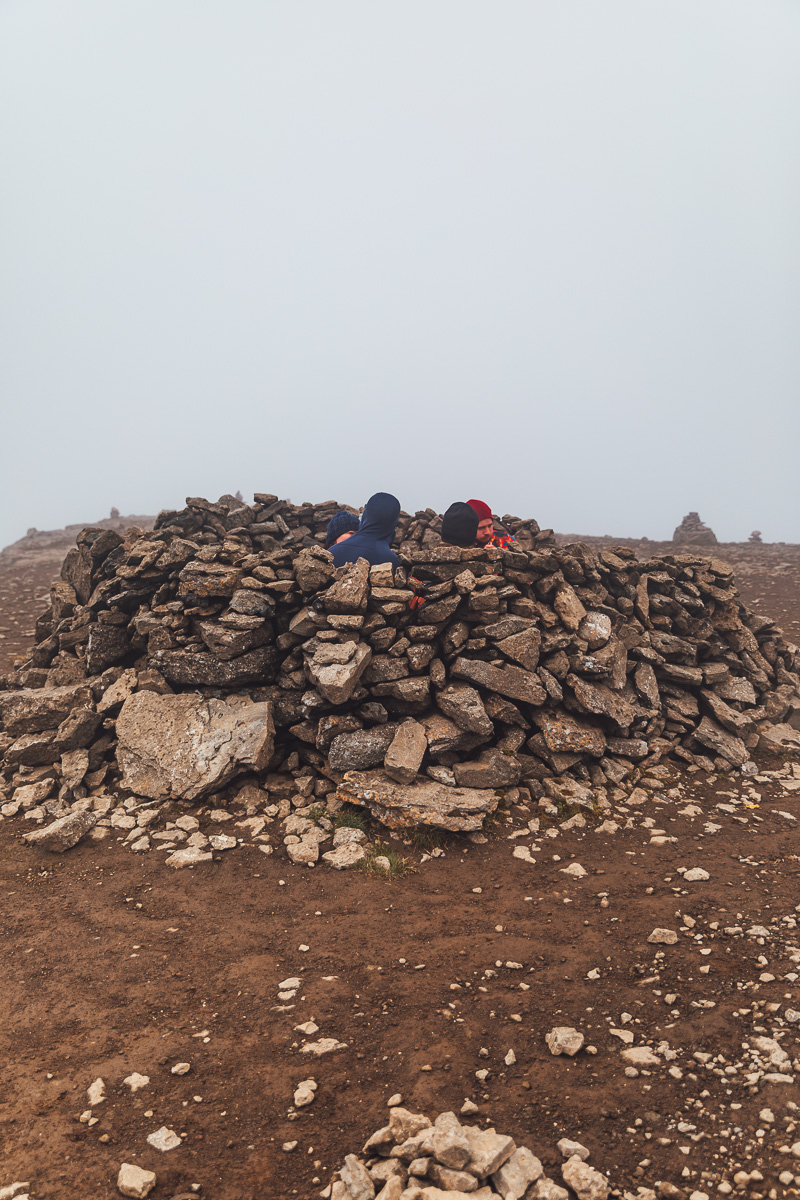
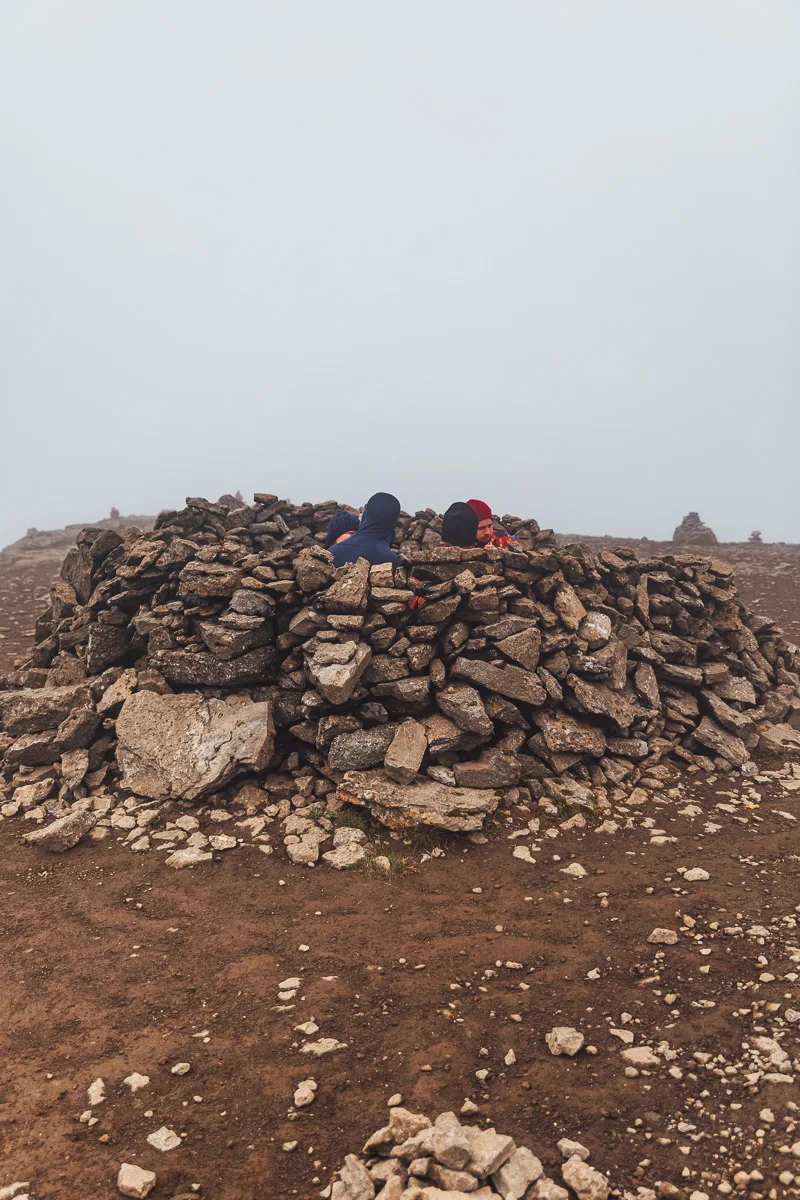
Day 7 – Eysturoy Island: Hike to Slættaratindur, see Risin og Kellingin, Eiði, and Gjógv village
Hike to Slættaratindur
After breakfast, get ready for hiking to the tallest peak in the whole Faroe Islands, and Denmark! The path up might be steep and requires some stamina, but it is by no means difficult.

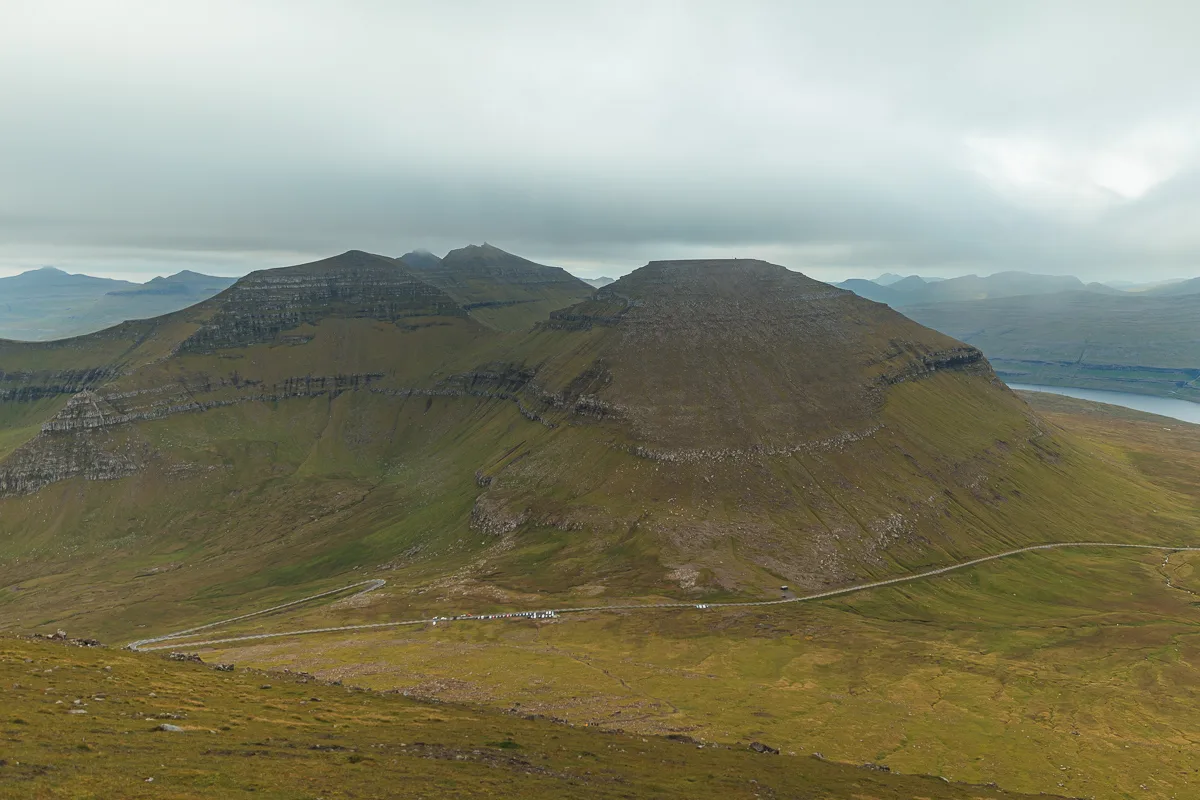

The peak is at 880 meters and you should have a wind jacket (very windy and foggy at the top) and proper shoes here, especially if the weather turns sour. The hike to Slættaratindur will take about 2 to 2,5 hours and you’ll have plenty of time to see the rest of the beautiful places on this island.
View of Risin of Kellingin
This is a short stop and you’ll see the large parking lot and the view of these two sea stacks on the way to Eiði. The name Risin og Kellingin means The Giant and the Witch and is related to an old legend.


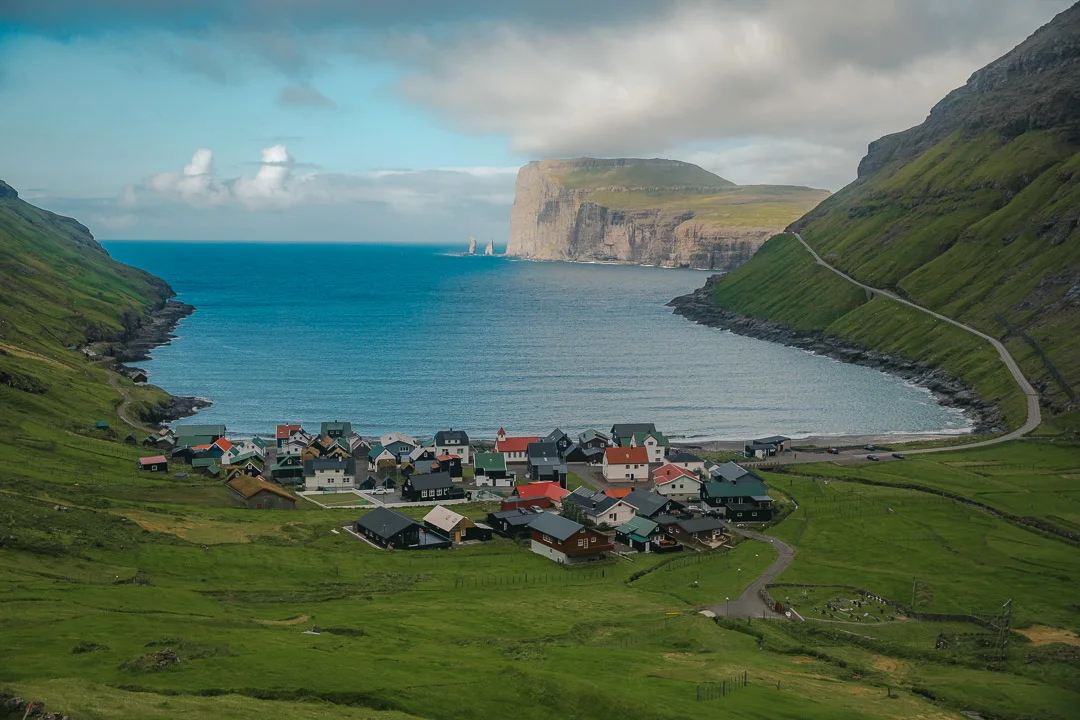
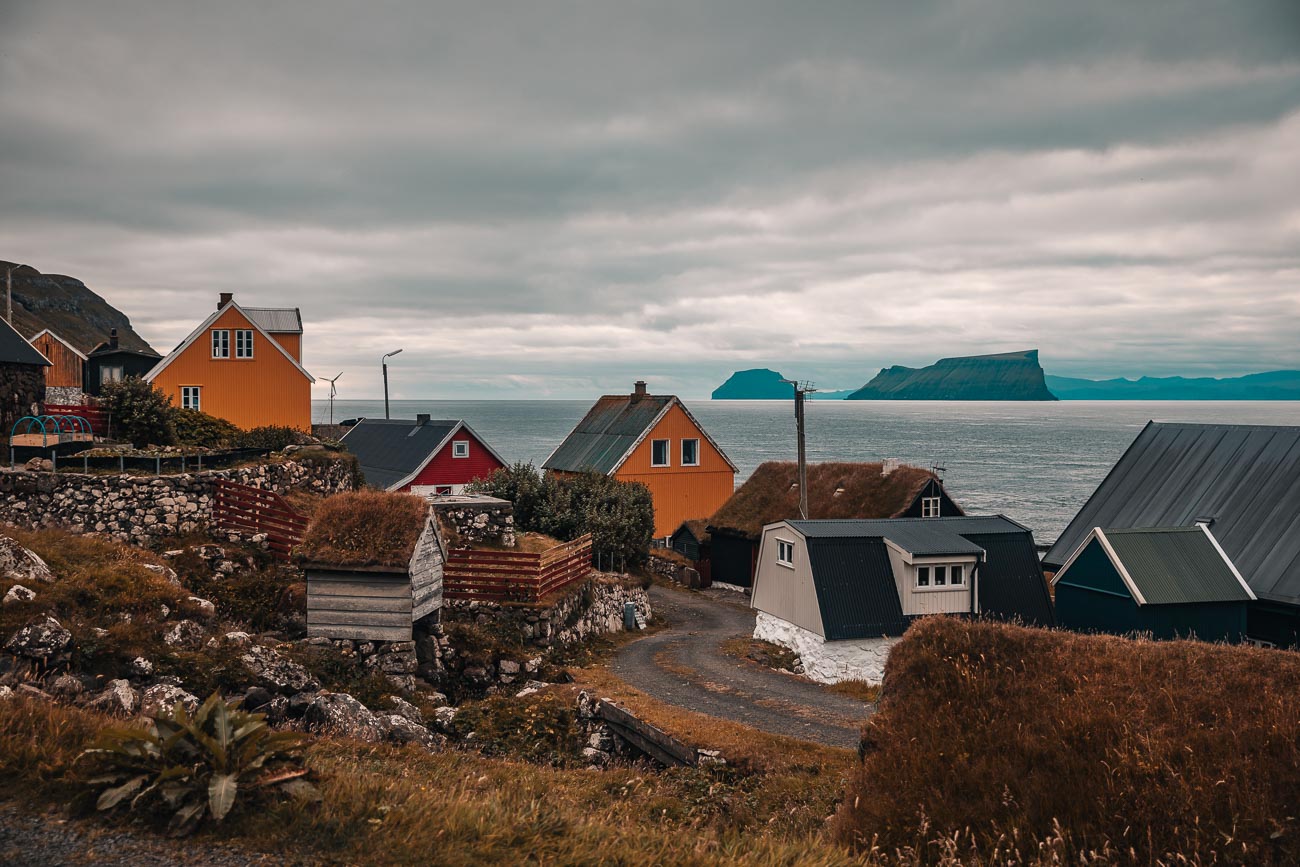
Eiði and Gjógv village
Drive past Eiði village and take in the charming Faroese views.


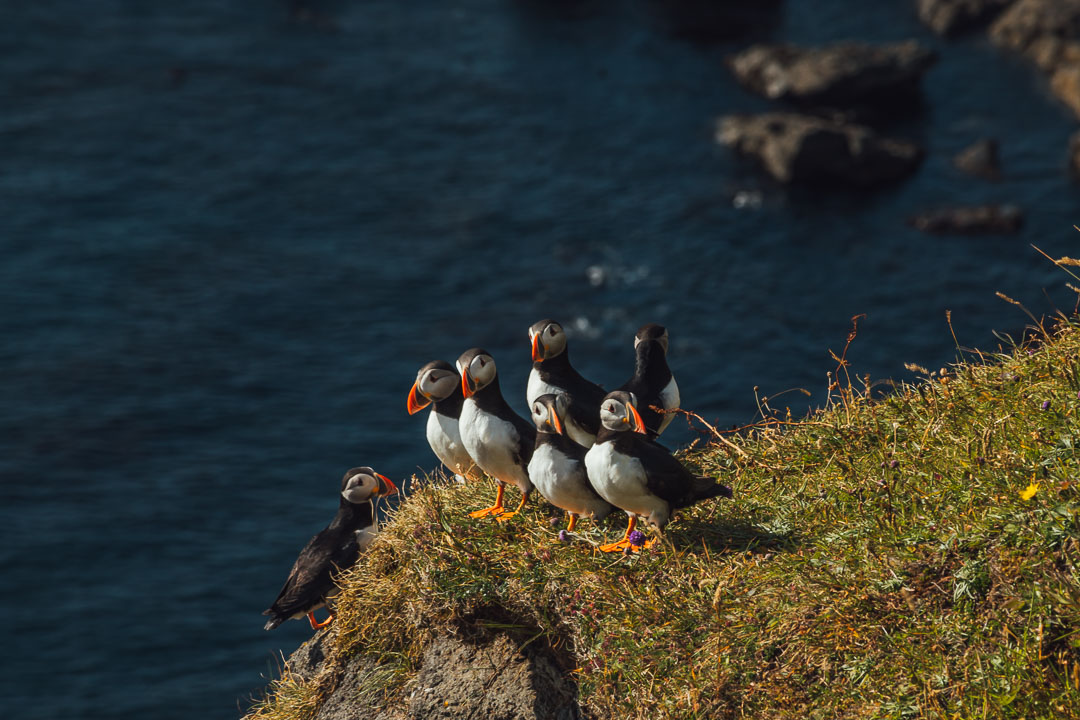
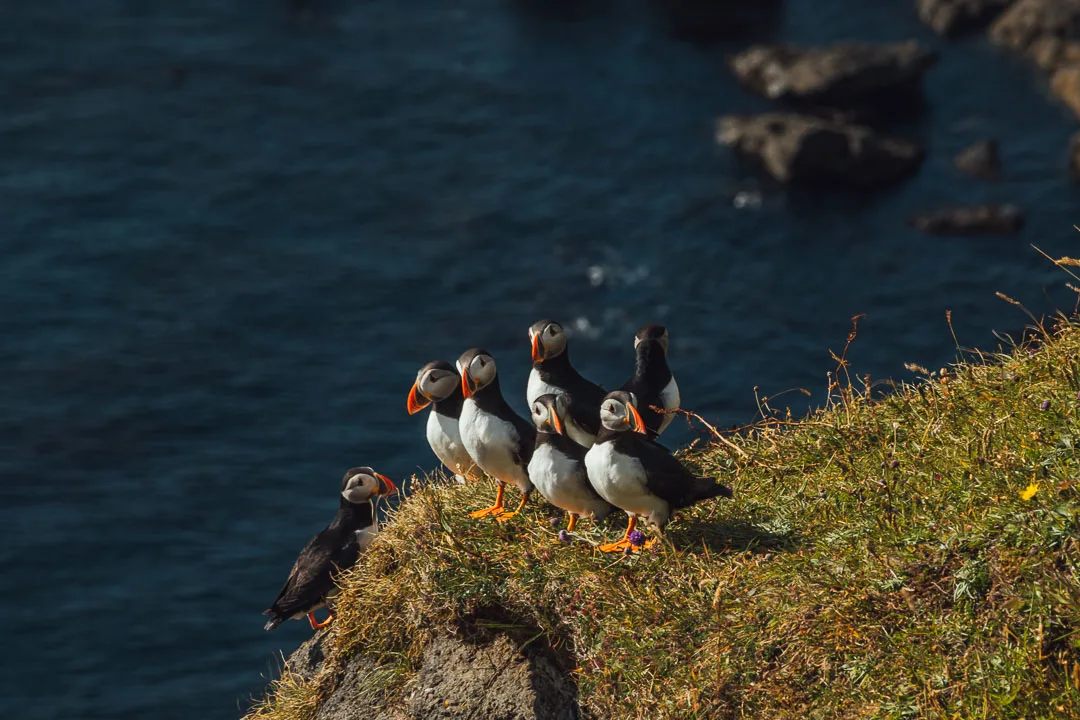
After that make your way to Gjógv village and stroll, take photos and enjoy a cup of coffee. If you’re visiting at the right time of the year (summer), you’ll even see puffins here! Hard to choose which are the prettiest villages on this Faroe Islands itinerary, right?


Day 8 – Visit Klaksvík, Viðareiði, then head to Hvannasund on Vidoy Island
Today you are checking out and driving towards Vidoy island. You will drive through the last paid tunnel here, this one costs 100 DKK both ways. But that doesn’t mean that’s the end of tunnels – quite the opposite! This part of the Faroe Islands is packed with tunnels and many of them are one-way, pitch-dark and a little bit scary if you ask me. But they’re wide enough and easy to drive through – I just wouldn’t walk there!
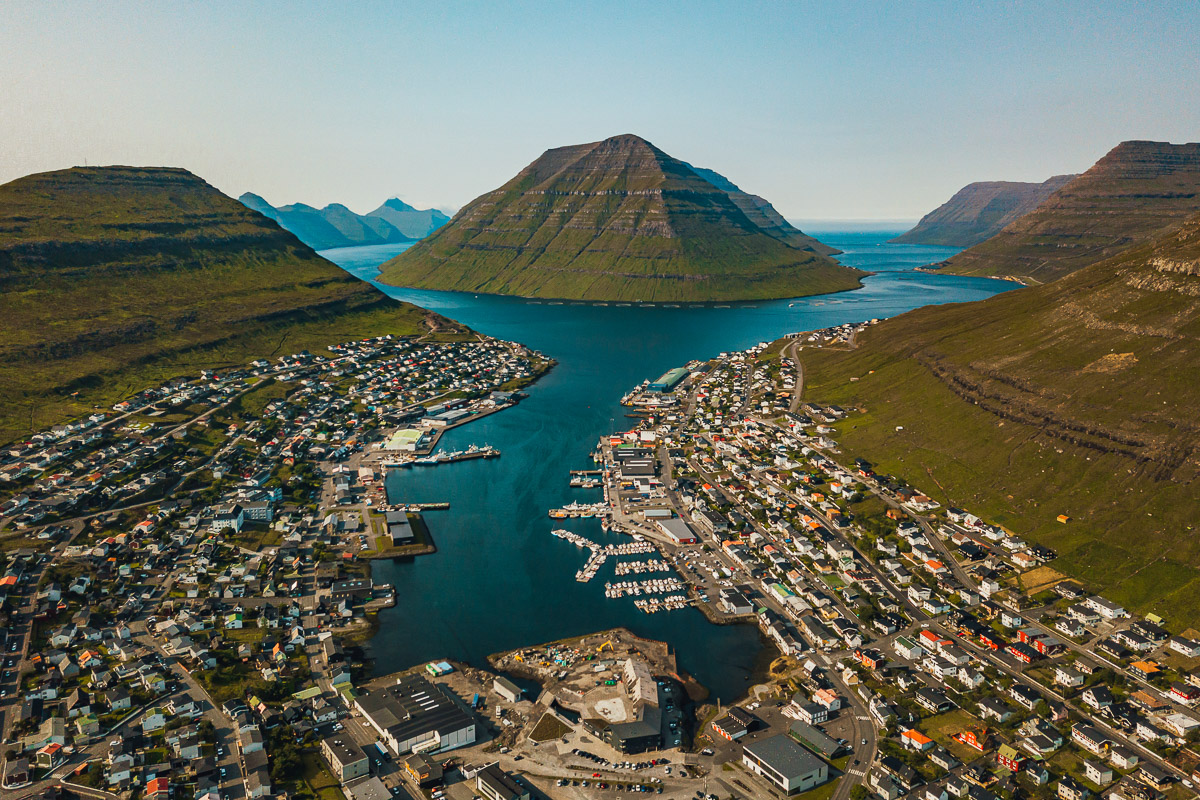
Make a stop at Klaksvík for some amazing views of the city hugged by hills, get some groceries (since this is the second biggest city in the Faroe Islands), see Viðareið and then head off to your next accommodation for a relaxing night in.

We booked a tiny cabin in Hvannasund and it was just perfect. You’ll be staying your last two nights here, while you explore all the things left on this part of the Faroe Islands itinerary.


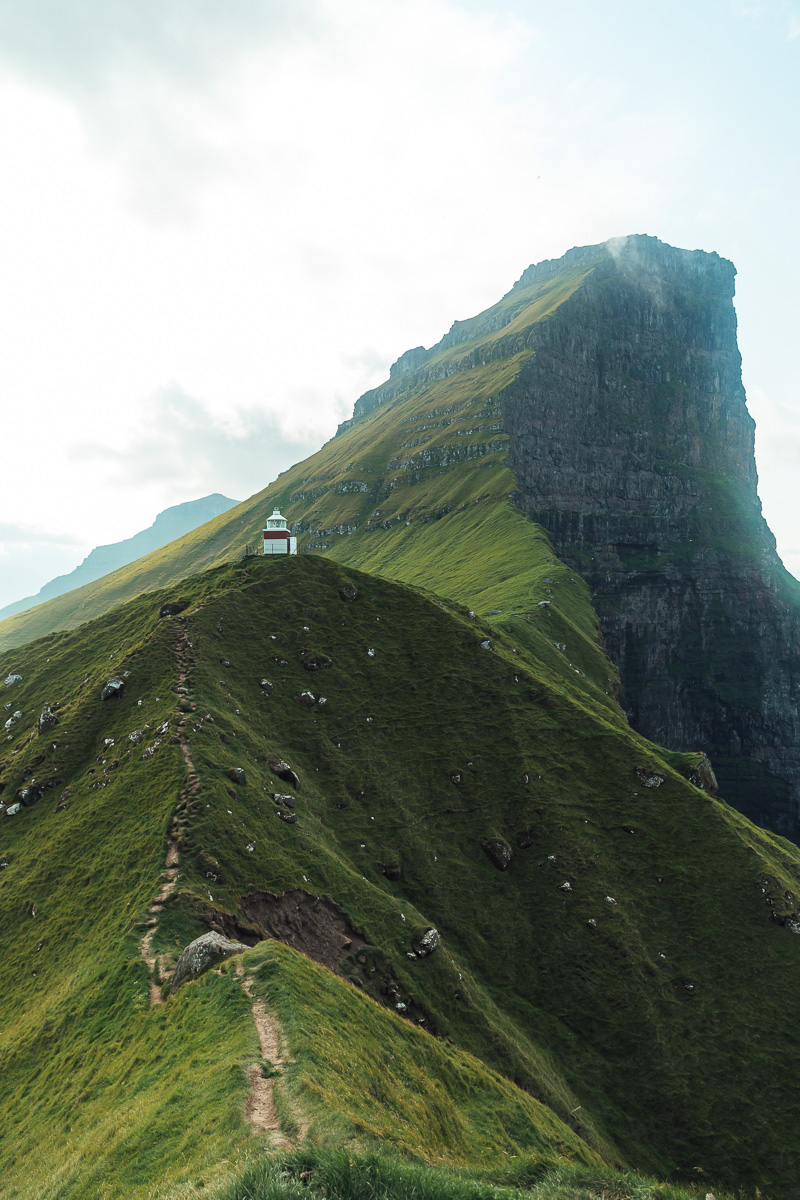
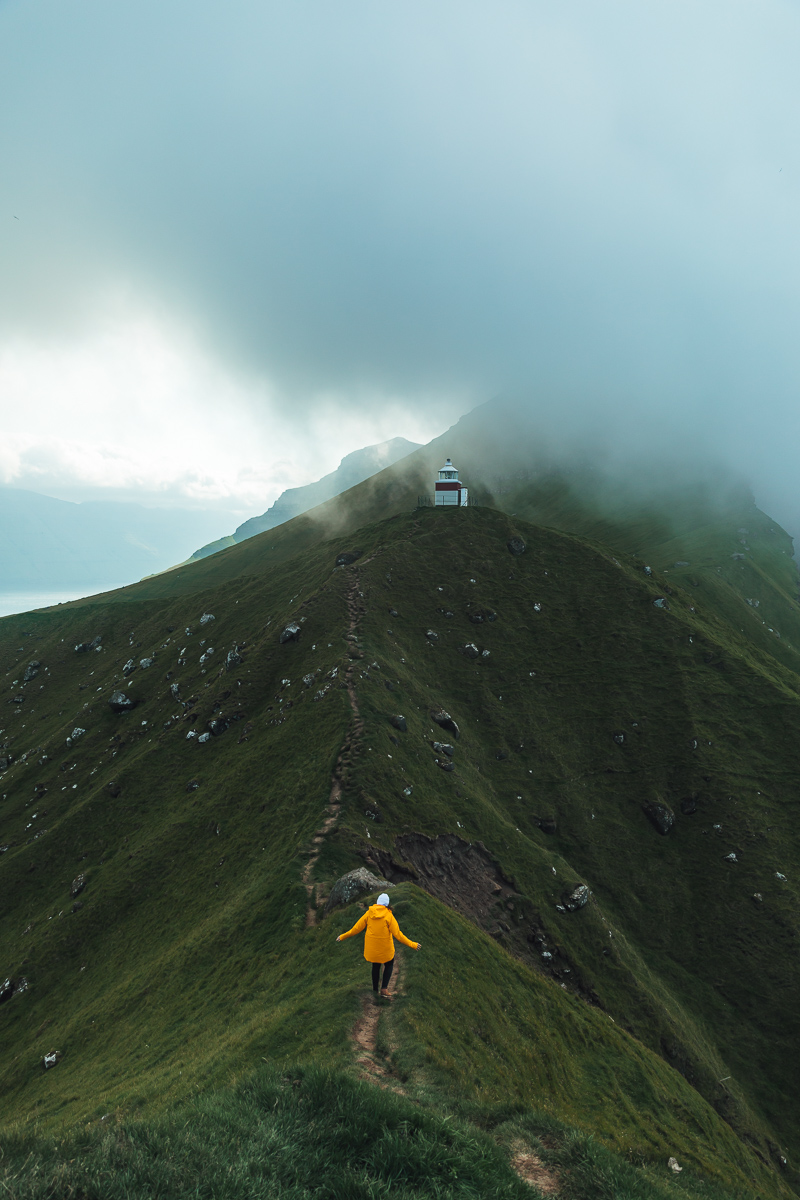
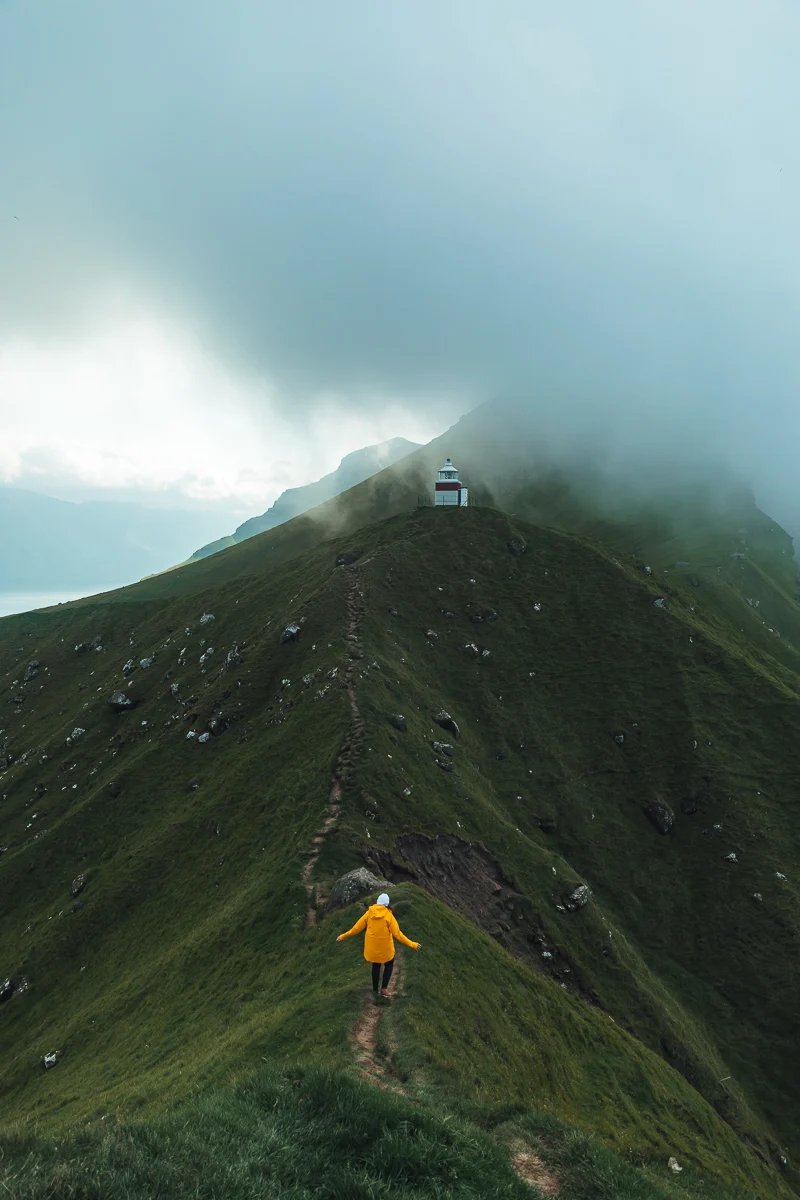
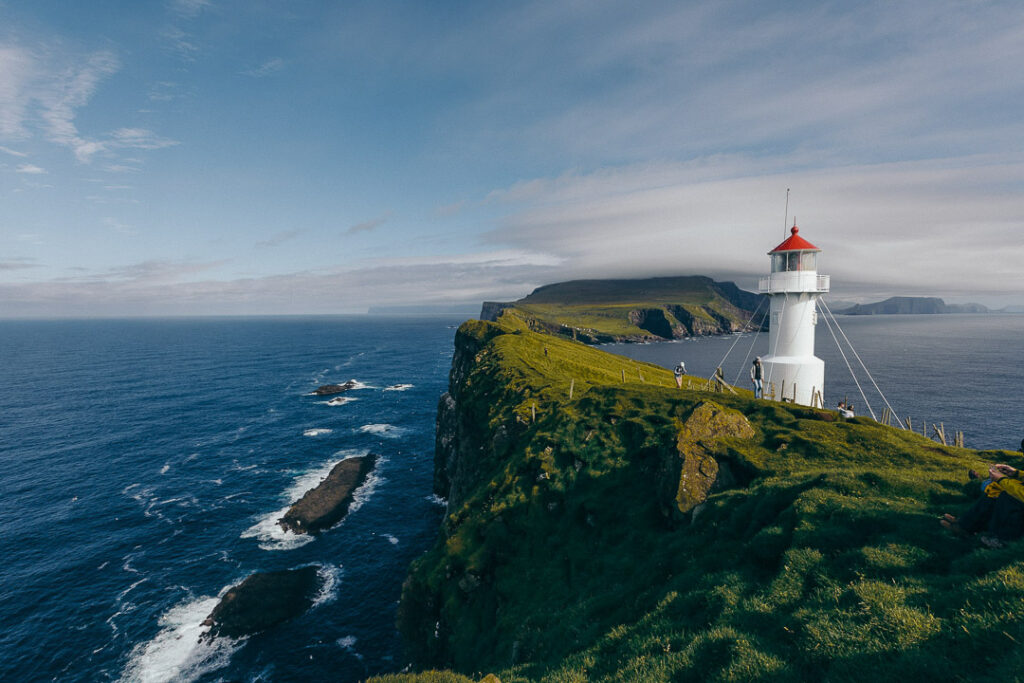
Day 9 – Day trip to Kalsoy Island: Mikladalur, Kóppakonan, Kallur lighthouse
Start bright and early at 6 am and head to the ferry spot in Klaksvík that will take you all the way to the beautiful Kalsoy island. Make sure you are there early to secure a spot on the ferry since the space is very limited.


Kalsoy is most famous for the Kallur lighthouse hike and I was convinced it would be a tough hike – in reality, it wasn’t at all! The only place that scared me was walking across the steep path to see the lighthouse from the other side. Once you are done with the hike, slowly head back towards the ferry terminal and visit Mikladalur, Kóppakonan and take in all the sights on your last full day here!

Bear in mind that Kalsoy is also packed with tunnels, though all of them are free.
Day 10 – Head to the airport
Your last day of this Faroe Islands itinerary has arrived and you are off to the airport. You will make your way back through quite a few tunnels now, but none of them you will have to pay extra for. The fees are always charged only once, so in total (with this itinerary), you’ll be spending a max of 400 DKK for the three big tunnels.
Park your car at the airport for the rental company to pick up and you’re off!
Mykines – Optional
I know, it says optional when Mykines tends to be such a must-do on so many other guides. But quite frankly, the only reason we were interested in going there was to see the puffins.
What no guide tells you (and I got this information straight from the Faroe Islands tourism office) is that puffins can be seen in many places in the Faroe Islands. Albeit, not quite as many as you can see on Mykines, but in our case, the extra fees and complications around going there simply weren’t worth the hassle.

If you however really want to go, then you must read all the things you must know before you book your trip to Mykines.
The Map
I hope you enjoyed this Faroe Islands itinerary and if you have any questions, just ask in the comments below!
Faroe Islands Itinerary – Questions
How many days do you need on the Faroe Islands?
I found that the ideal time to spend in the Faroe Islands is 10 days. You could shorten your visit and visit fewer islands, but I would highly recommend to spend at least 7 days there. If you are short on time and only have a long weekend, then I suggest you spend 4 days on Vagar island. There’s so many beautiful spots there! I would say 3 days in Faroe Islands is too little though, unless you only want to see a handful of easy to reach spots.
Is Faroe island expensive?
The Faroe Islands are expensive and this is coming from someone who lives in Scandinavia. Car rentals are the highest expense we had, but they have some pretty steep hiking fees here too. I highly suggest you at least book your car well in advance because the longer you wait, the less cheaper options will be available.
Is it worth going to Faroe Islands?
It is 100% worth going to the Faroe Islands. It’s a beautiful place and I can’t wait to go back one day!
Save this post for later


Neffi
Tuesday 8th of October 2024
Great articles, thank you. I will check out the rest of your destinations, as well. i like your style.